The term point and shoot comes from the desire of consumers not to be bothered with photographic encumbrances such as aperture, shutter speed, manual focus, etc. One of the technological development to make this possible was in camera measuring. All modern cameras have this feature in various levels of complexity but if you defer to this “engineers algorithm” every time you take photograph you are letting the camera control the exposure rather than using your experience and knowledge to decide how the photograph should be exposed. Camera metering mode is a great guide to exposure and in this age of digital photography we have the luxury to look at the back of the camera and immediately see what we have shot. I don’t know how many times I have looked at the back of the camera to find an almost white overexposed image because I haven’t adequately checked the metering in the viewfinder. This makes me suspect I would not have been a particularly good film photographer. The thing to remember is ths in-camera metering is only a guide and you can adjust shutter speed, ISO and aperture to create the photographic exposure you desire.
This exercise was designed to illustrate this concept. In the first part of the exercise I was directed to produce between four and six photographs which were deliberately lighter or darker than average and discuss why.
Photograph 1.
Your camera’s light meter works by averaging the light reflected from the area being measured. This results in mid-tone halfway between black and white. In the photograph below of a white porcelain sculpture on a white background, the camera was producing a photograph much duller and greyer than my eye was seeing. Consequently the photograph below has been adjusted by two stops to produce something much closer to the actual scene.

Photograph 2
In the wedding photograph below the bride and groom were in shadow in a hallway. They are also a smaller part of the whole image but are definitely the subject and most important part of the image. There are a couple of options in this situation
- Choose spot metering on the camera and meter specifically the bride and groom.
- Use the cameras exposure composition to expose correctly for the bride and groom.
- With the camera in manual mode and increase shutter speed to expose correctly for the bride and groom.
It is worth noting that because of the dynamic range of the scene there is no alternative than overexposing the background to correct expose the subject

Photograph 3
The same situation arises here as i encountered in photograph 2. The model is in a dark room on a bright day. In camera metering would try to average the exposure to show some of the detail outside the window. So I manually overexposed to blow out the window and properly expose the model and interior details of the room.

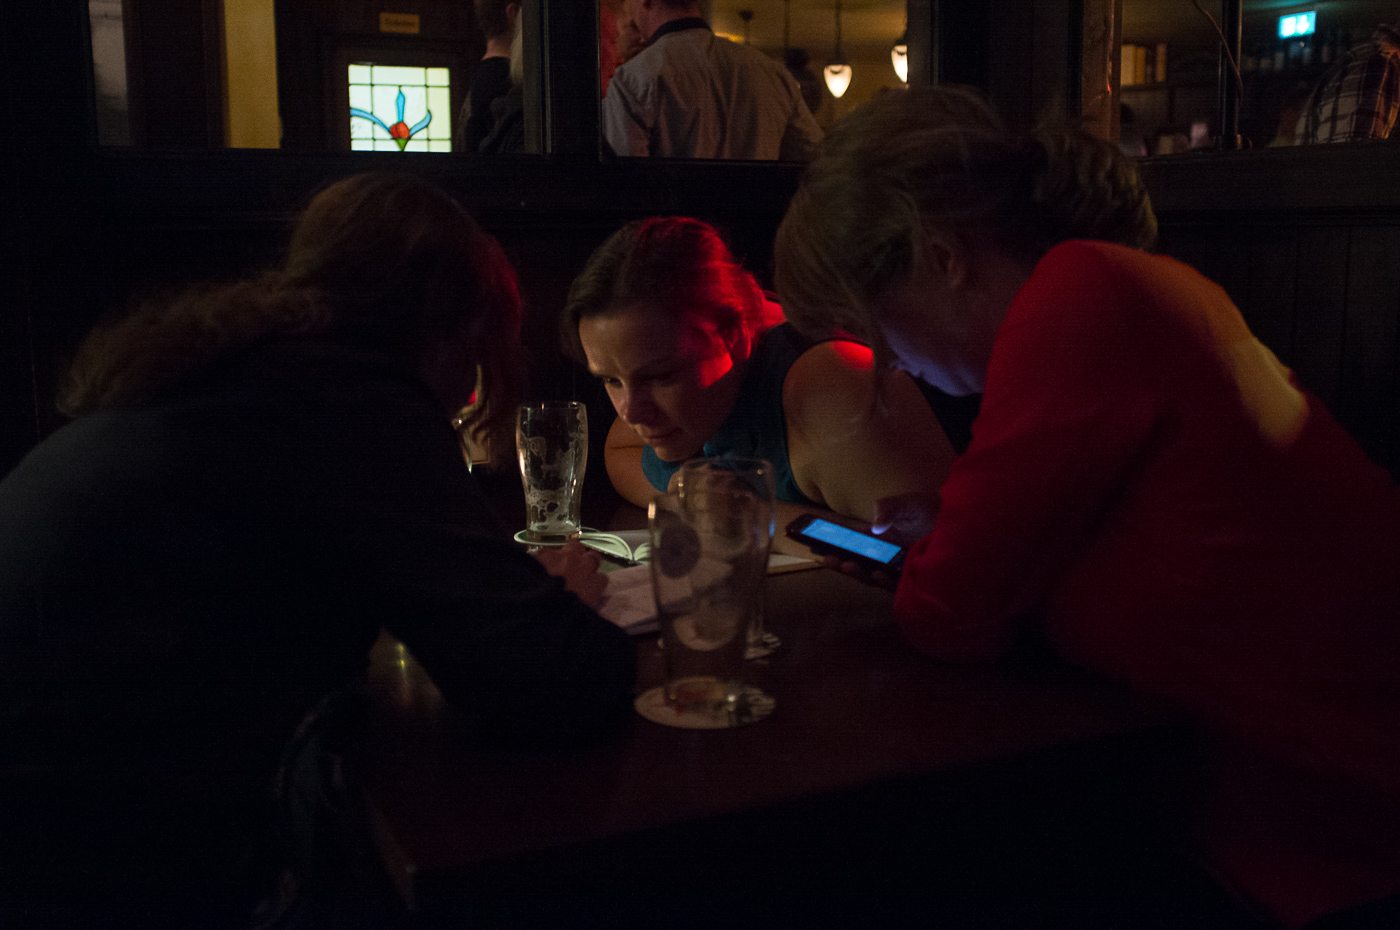
Photograph 4
Here we have the opposite situation where the girls faces are lit by the LCD screens of their phones. I did not want an average exposure showing everything in the frame and thus have the camera automatically try to compensate for the lack of light. So in this case I have stopped down to correctly expose for the girls faces. This has the effect of losing detail in the shadows and further emphasising the faces as subject of the photograph.
Photograph 5a and 5b
Photograph 5a is an image of an alleyway taken with average metered exposure. Its an adequately exposed photograph.

In photograph 5b I have inserted myself in the picture, strongly lit from above and the front, this resulted in me being overexposed at the same camera settings used in the photograph 5a. Therefore I manually stopped down to adjust the exposure for me as the subject and concequently the background becomes much darker.

Photograph 6a and 6b
In Photograph 6a I was shooting in dark conditions at a relatively high ISO and I was concerned that to go any higher would introduce an unwanted level of noise into the photograph but slowing the shutter speed to properly expose the photograph would introduce motion blur (Cold night + heavy camera + lens zoomed to 200mm + worrying about being punched by a drunk person = camera shake). So I underexposed the shot getting the results below.

As I said earlier in the post, the digital age is very forgiving to photographers and another bonus of this high tech era is the combination of raw files and software such as Adobe Lightroom. The algorithms in Adobe software have meant that I was able to adjust the exposure in post production and produce what I consider to be a better image.

Reflection
I am squarely back in my comfort zone with this exercise. I felt that the colour part of the module was not progressing as I hoped and I was falling behind so rather than get bogged down in a mire of colour, self-pity, procrastination and apathy and I decided to move to the “light” section of the course in an effort to reinvigorate my study. I am not abandoning the colour section and will work on the colour assignment as well as working through the light exercises.
Although this was a technical exercise, the images used have a slightly more artistic feel than those used in previous technical exercises. I have enjoyed getting back to the nuts and bolts of elements like exposure. The direct scientific subject of light appeals to more logical side of my nature.
The one thing this exercise taught me is that although there are technical aspects to exposure they are used in a subjective manner to create the desired aesthetic.