OCA TaoP

OCA degree in photography module 1

Reflection on introduction

Jacob Cycle-1001 This is an entirely new way to study for me. I have been used to brick and mortar educational establishments, and scheduled classes. I am finding it hard to ignore the distractions and settle down to studying in the evenings.

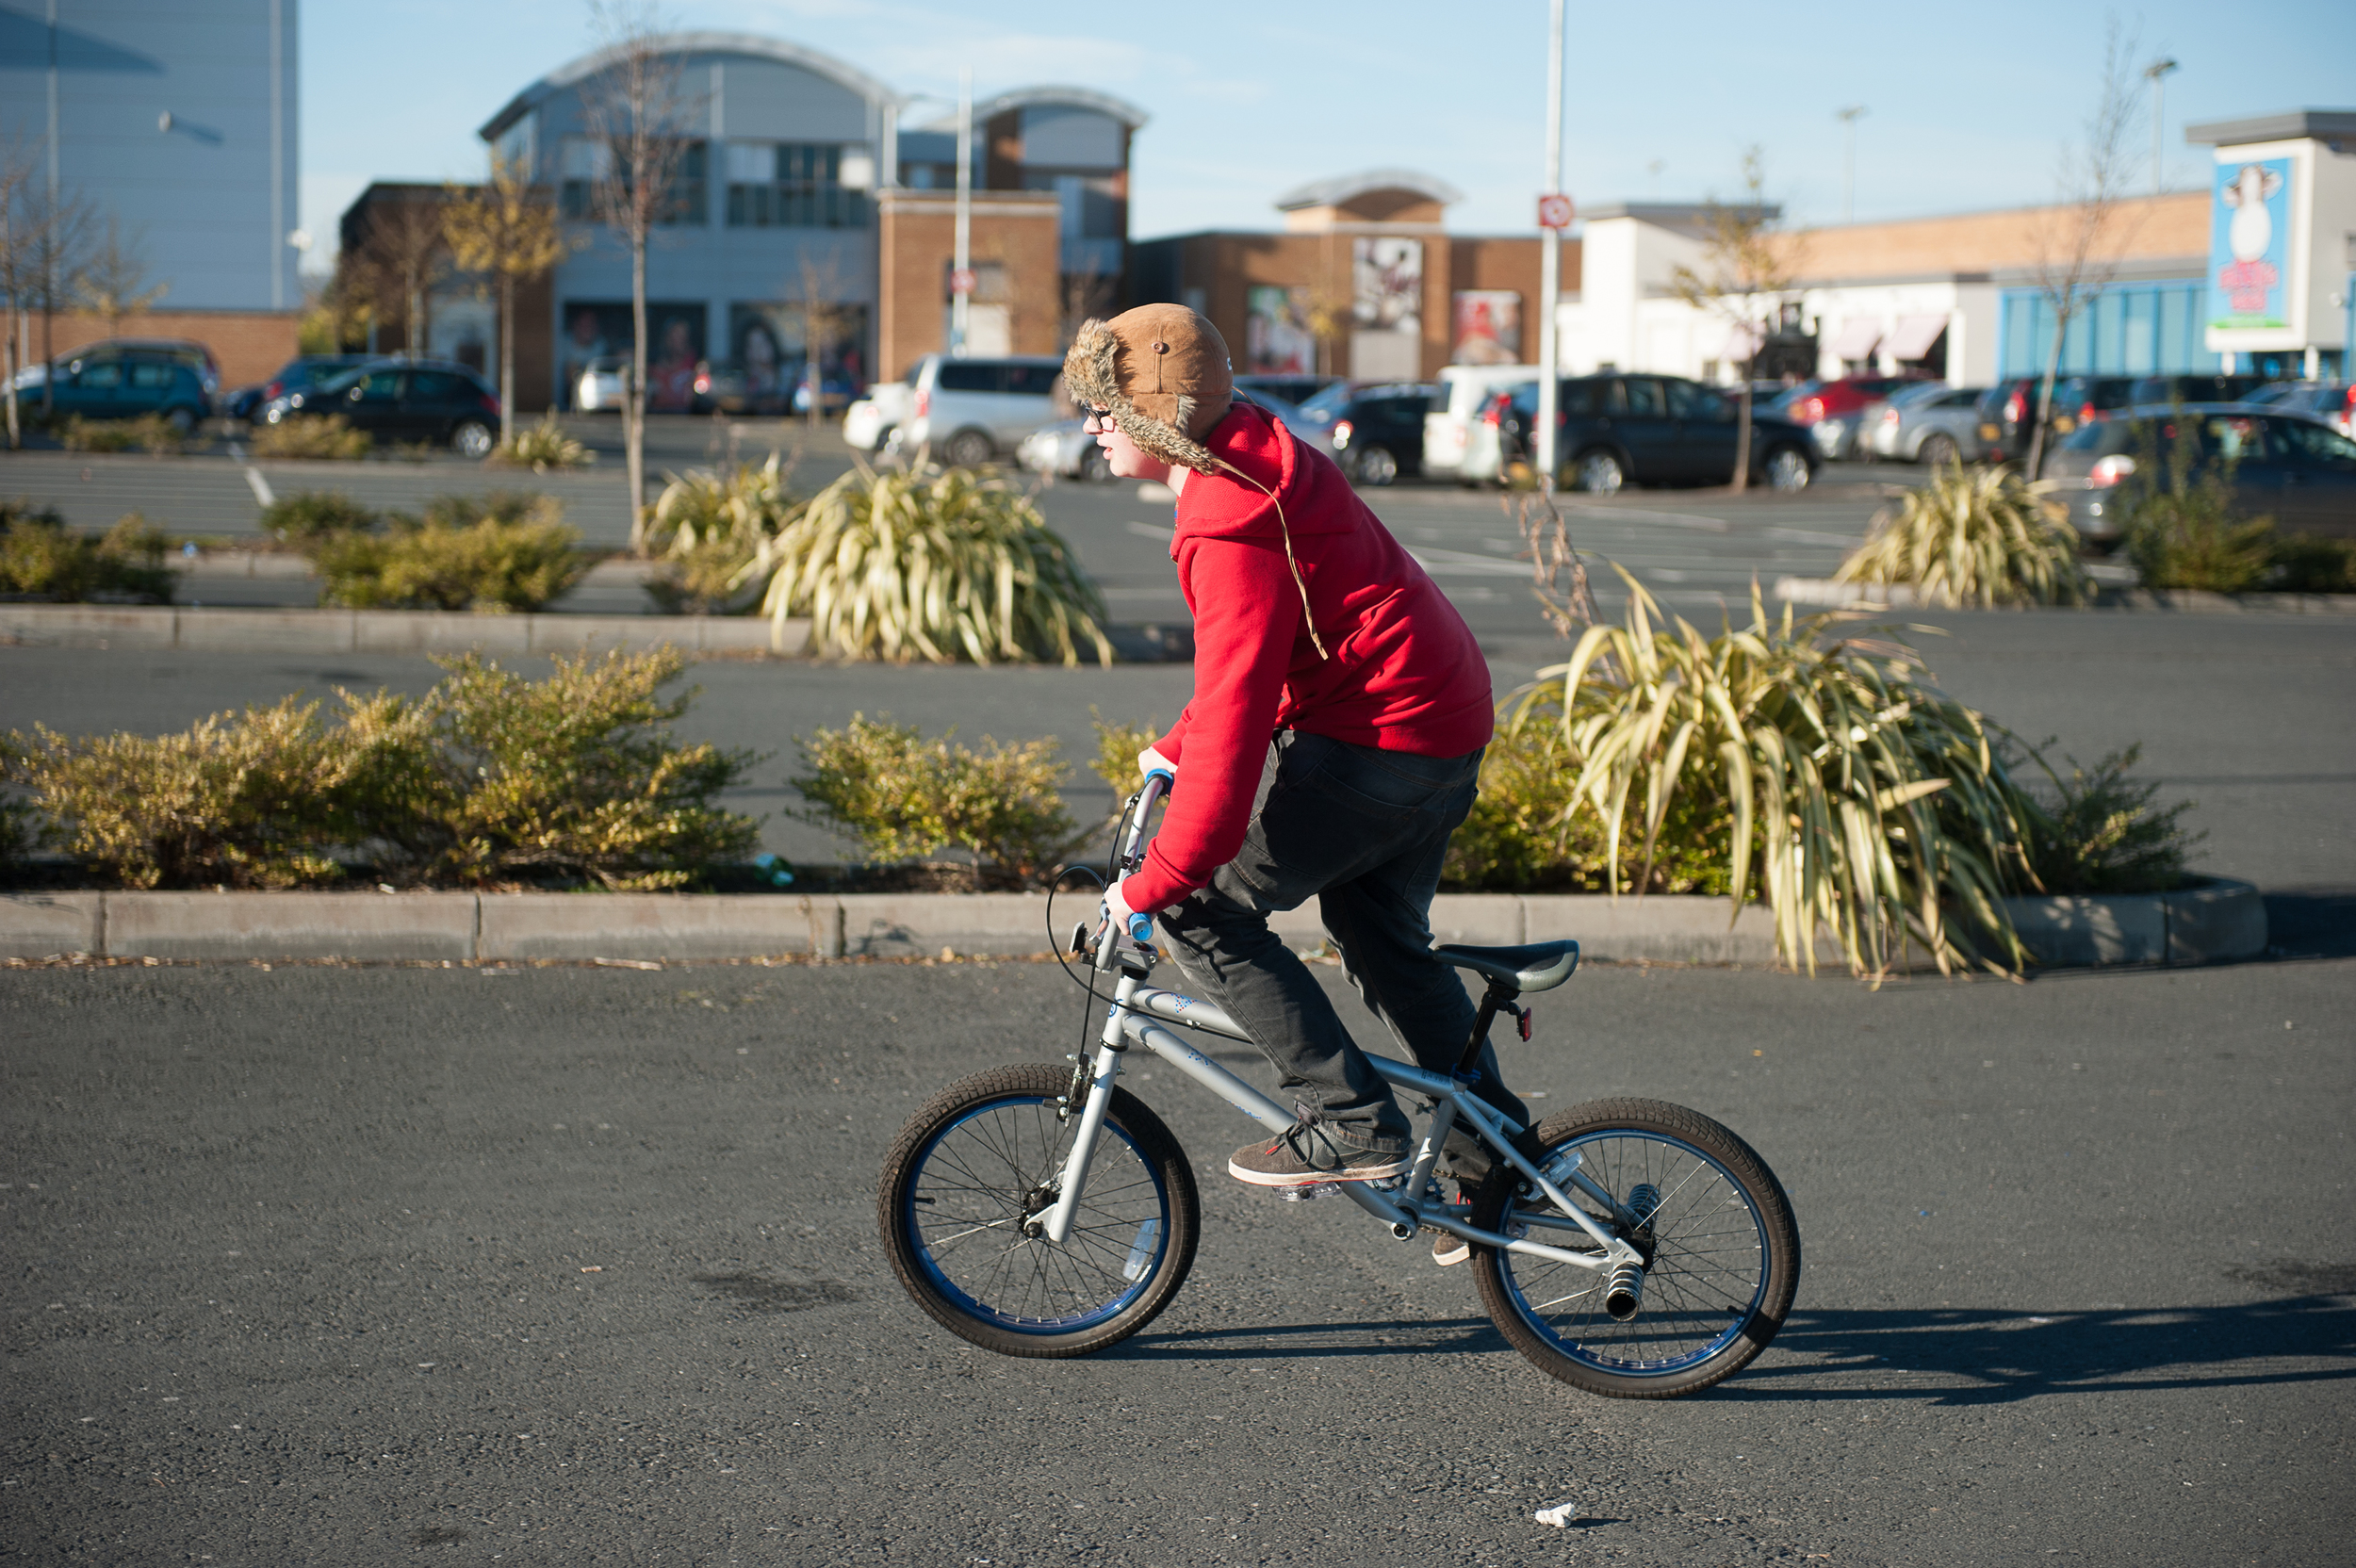
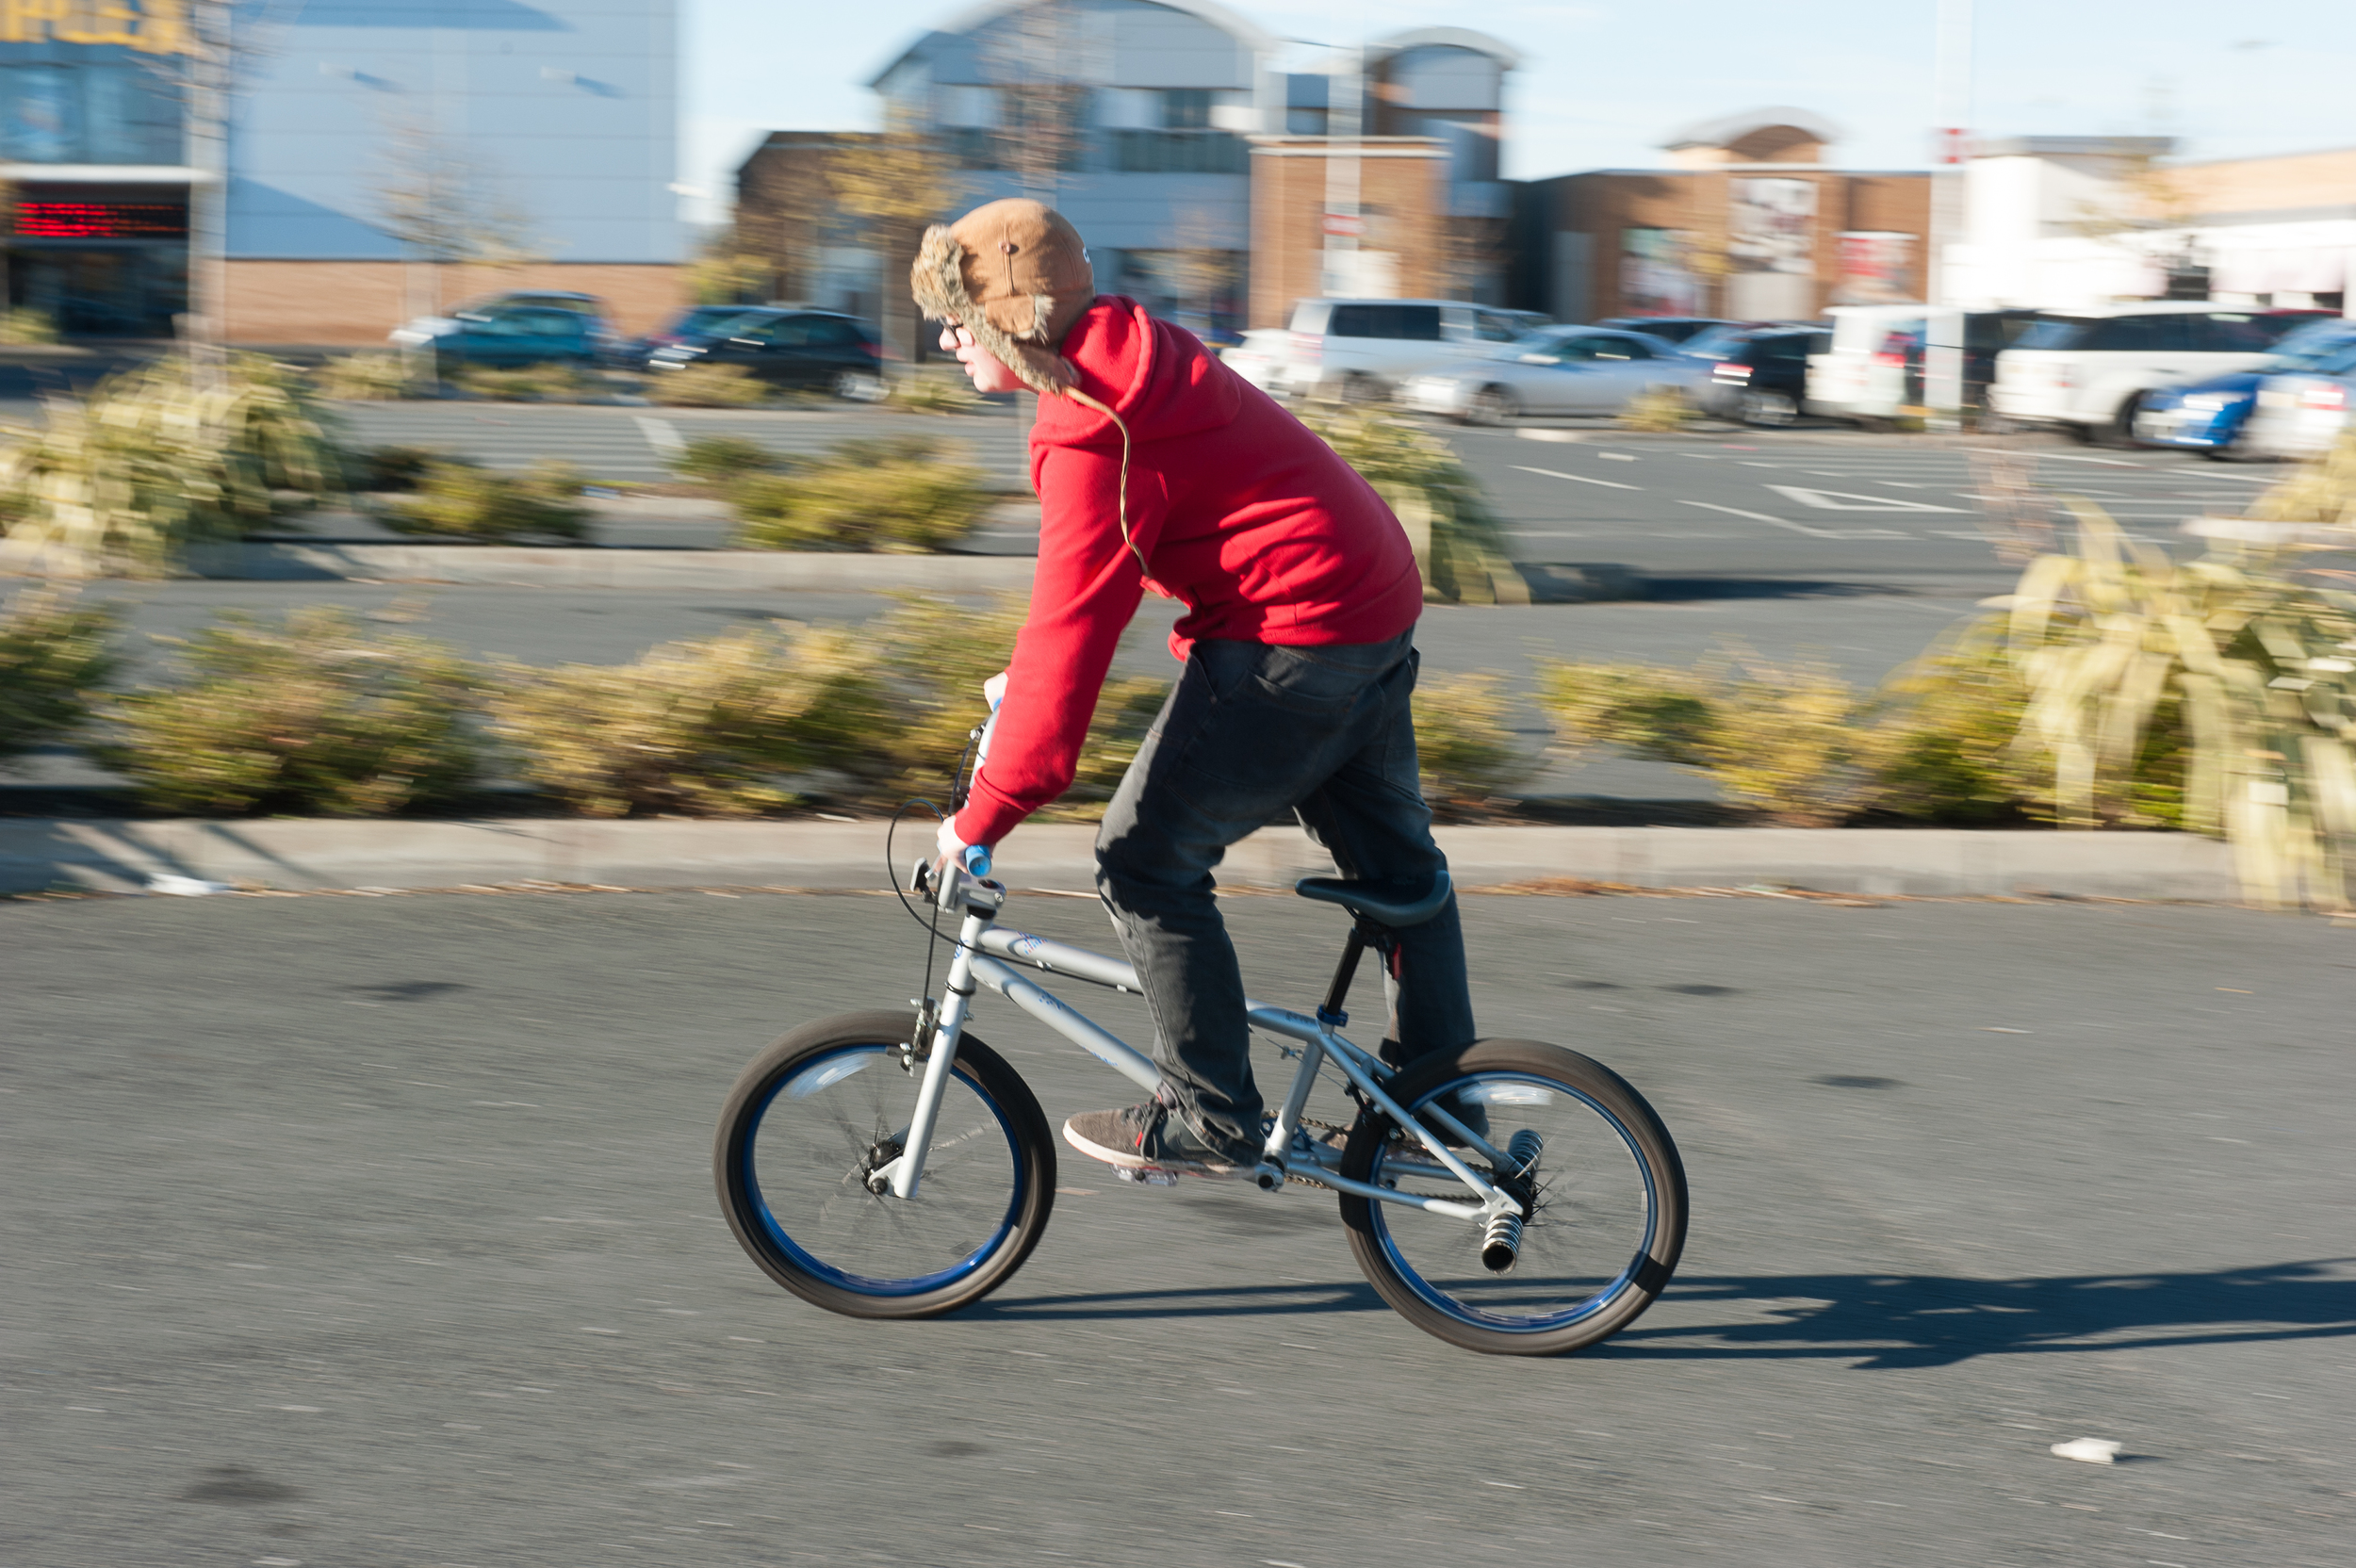
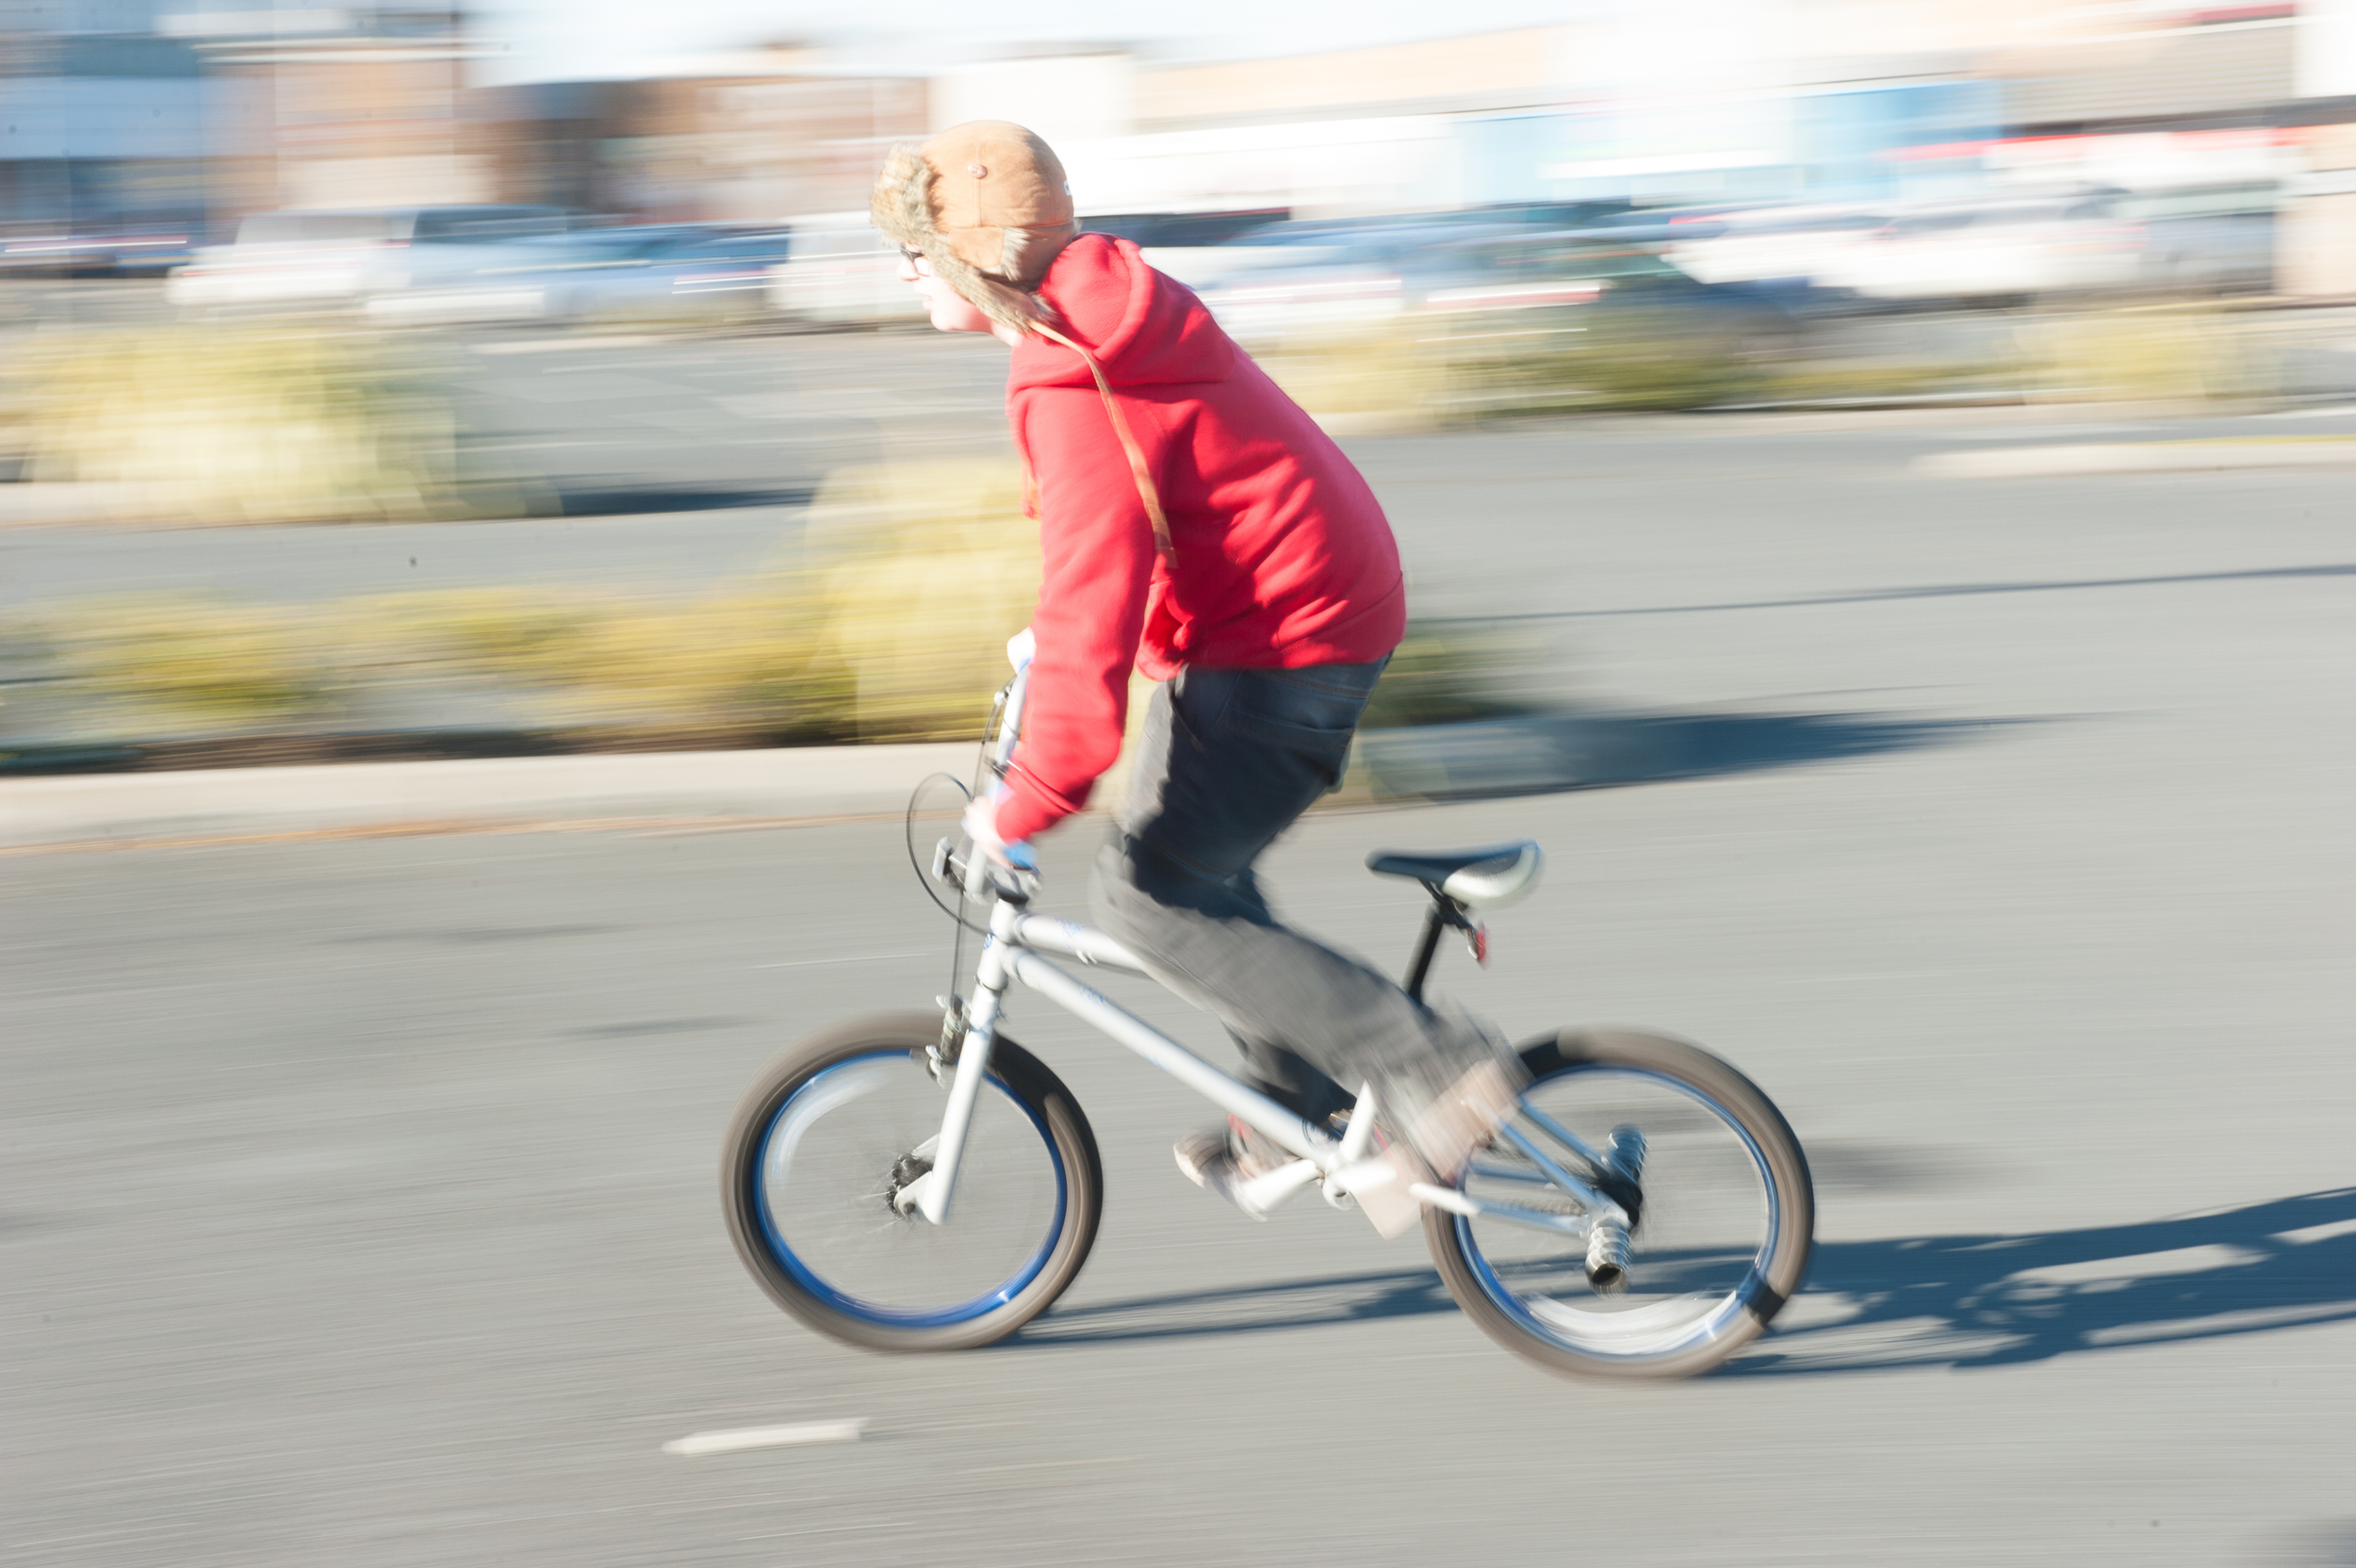
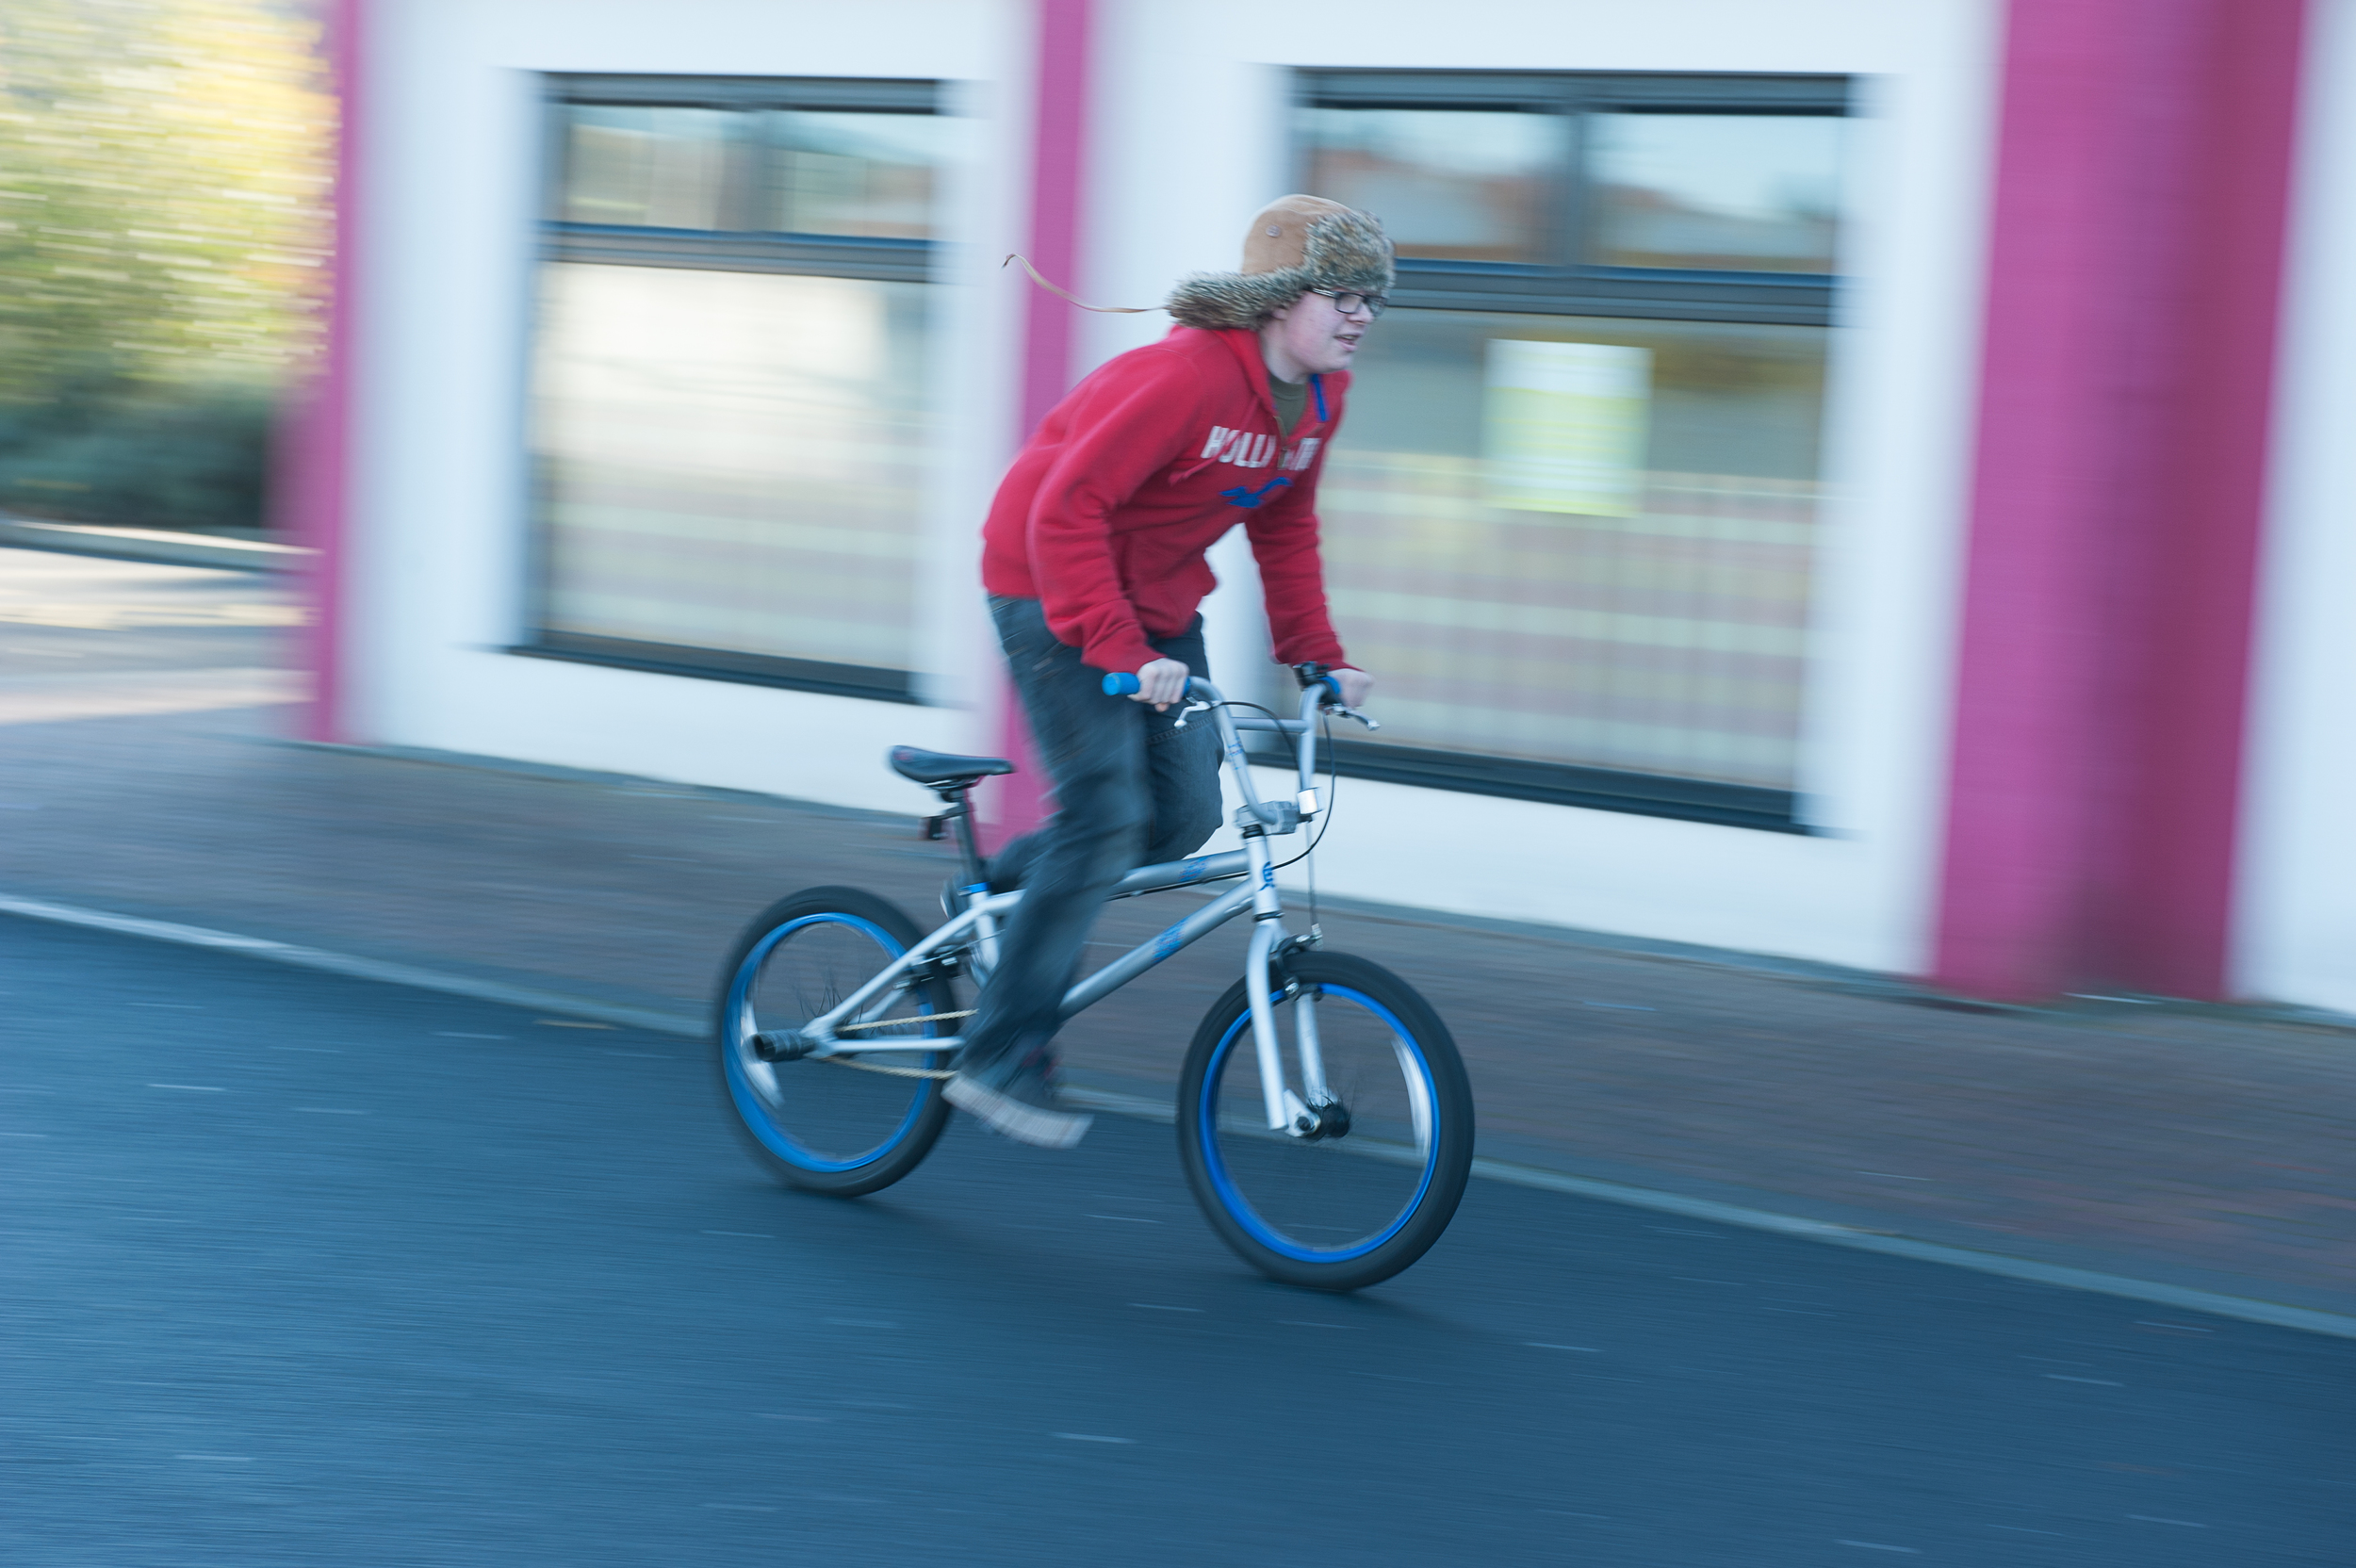
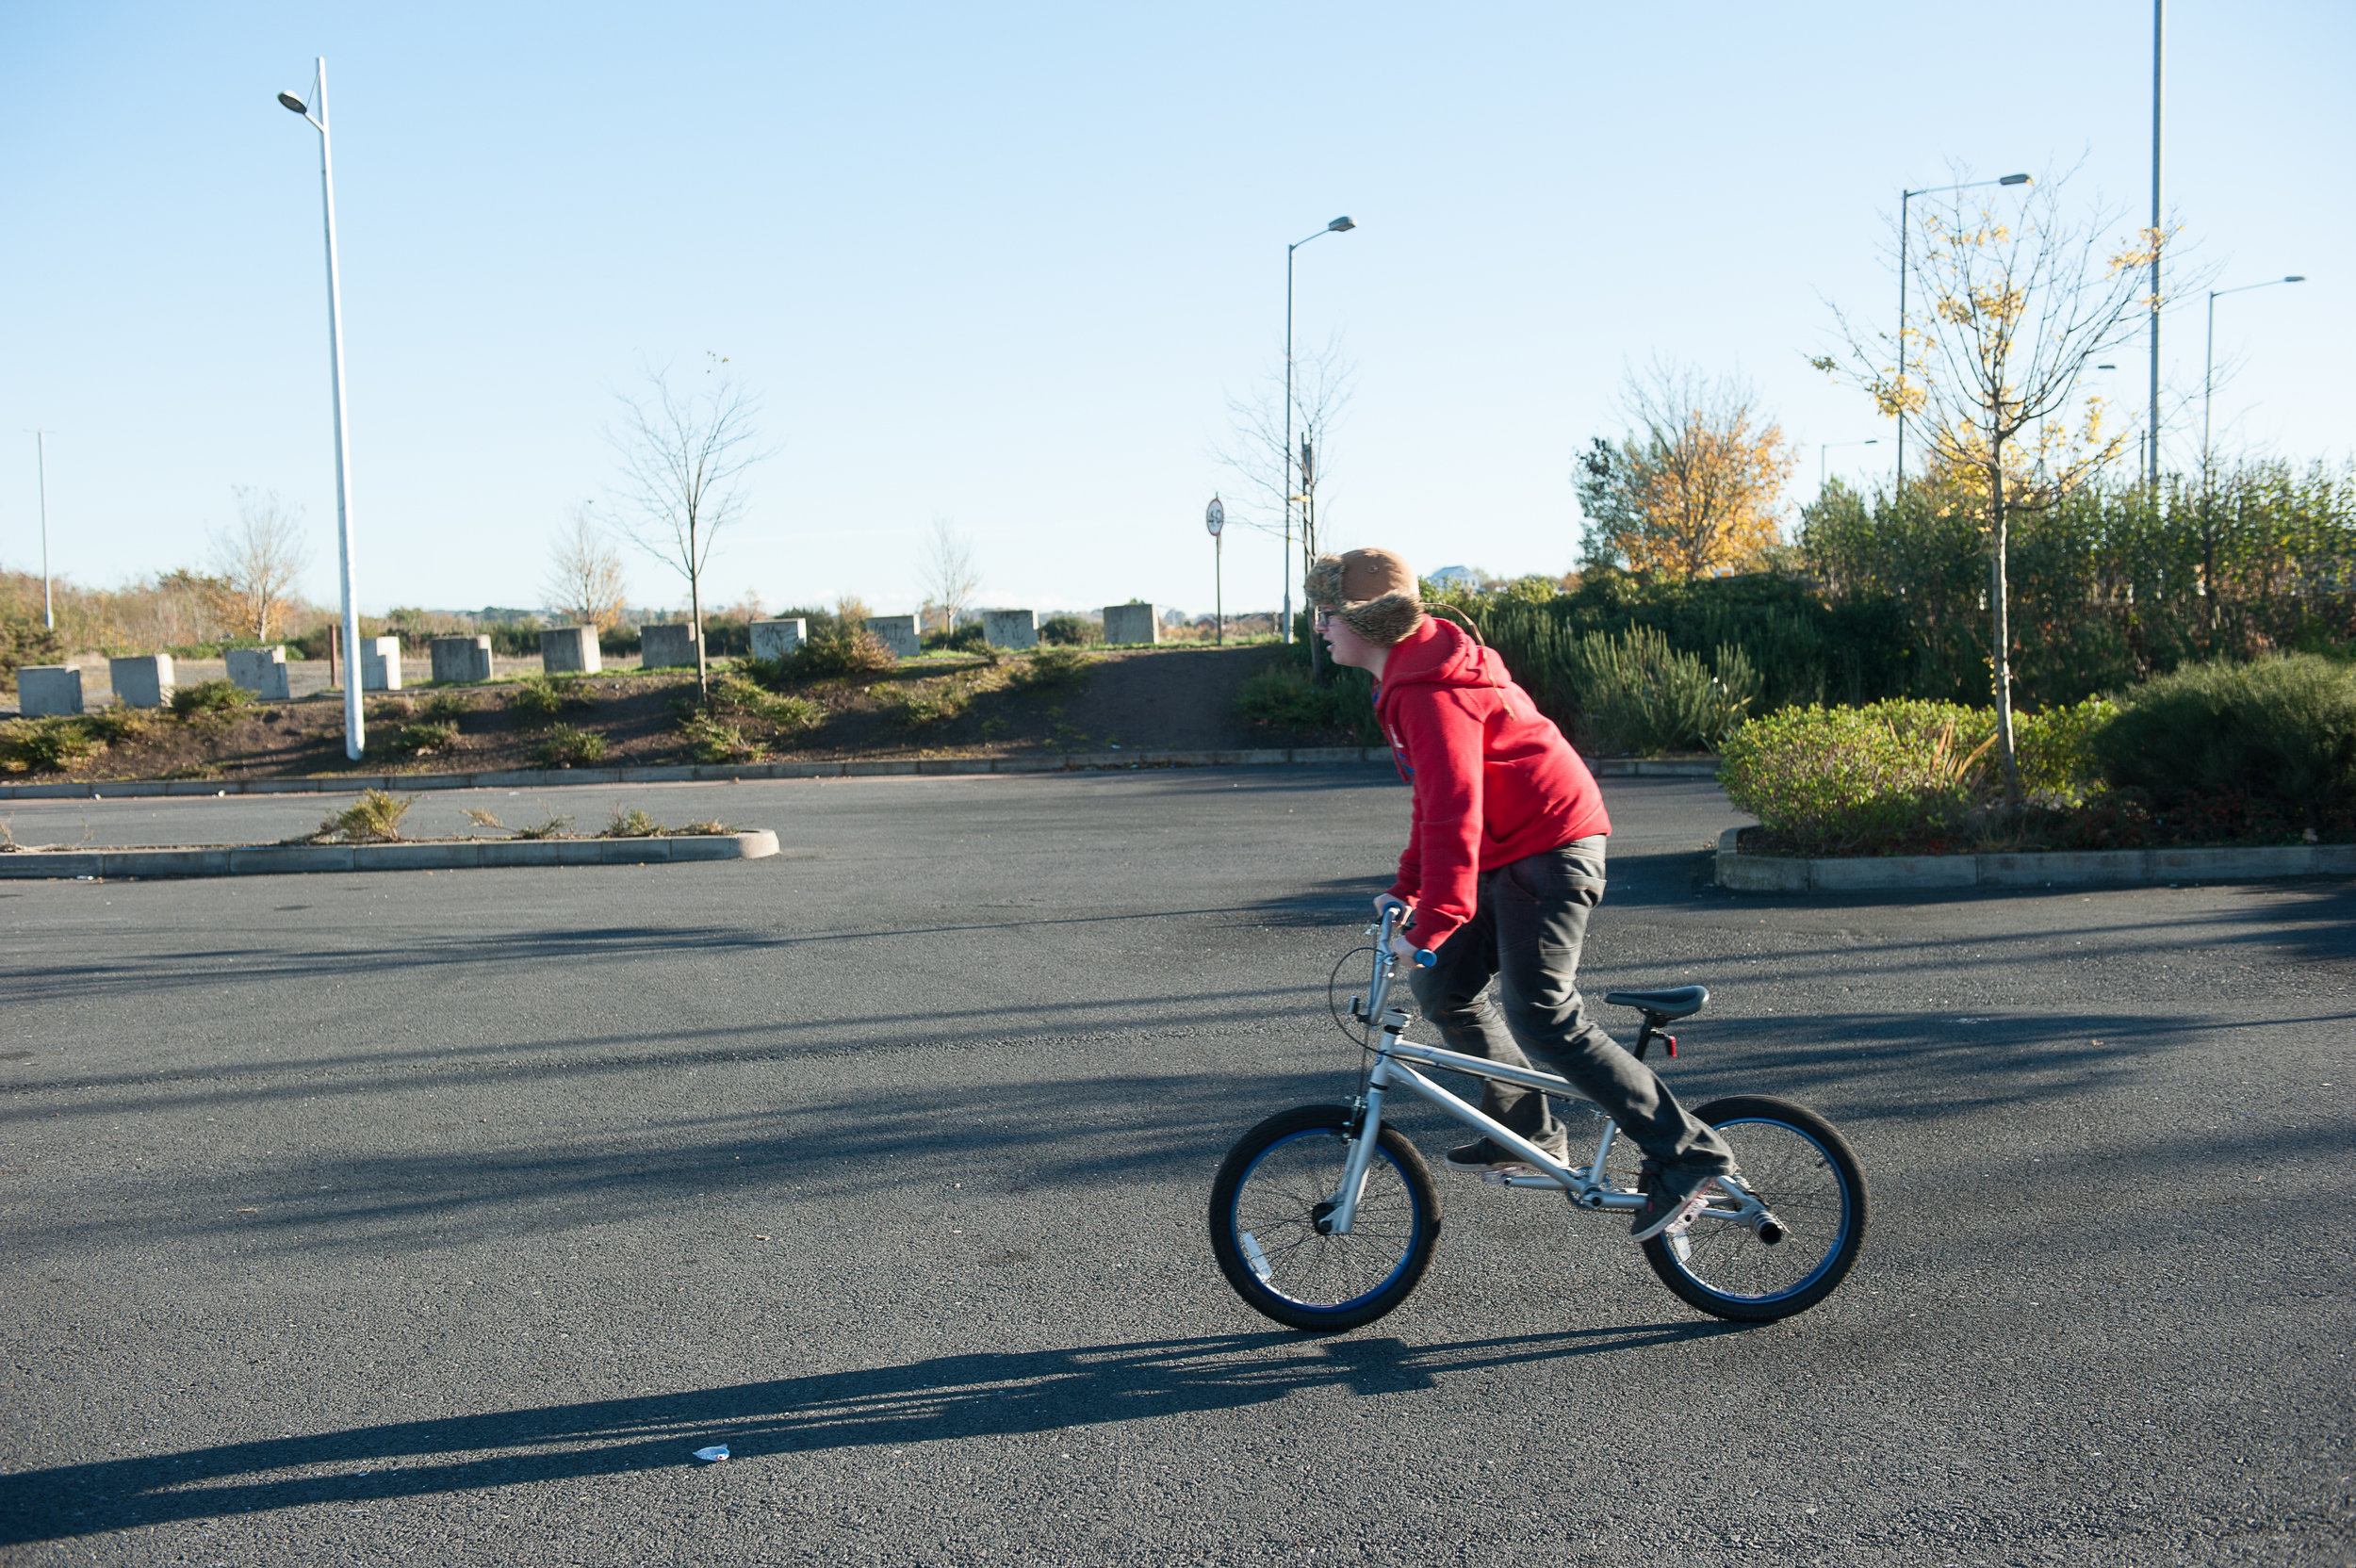
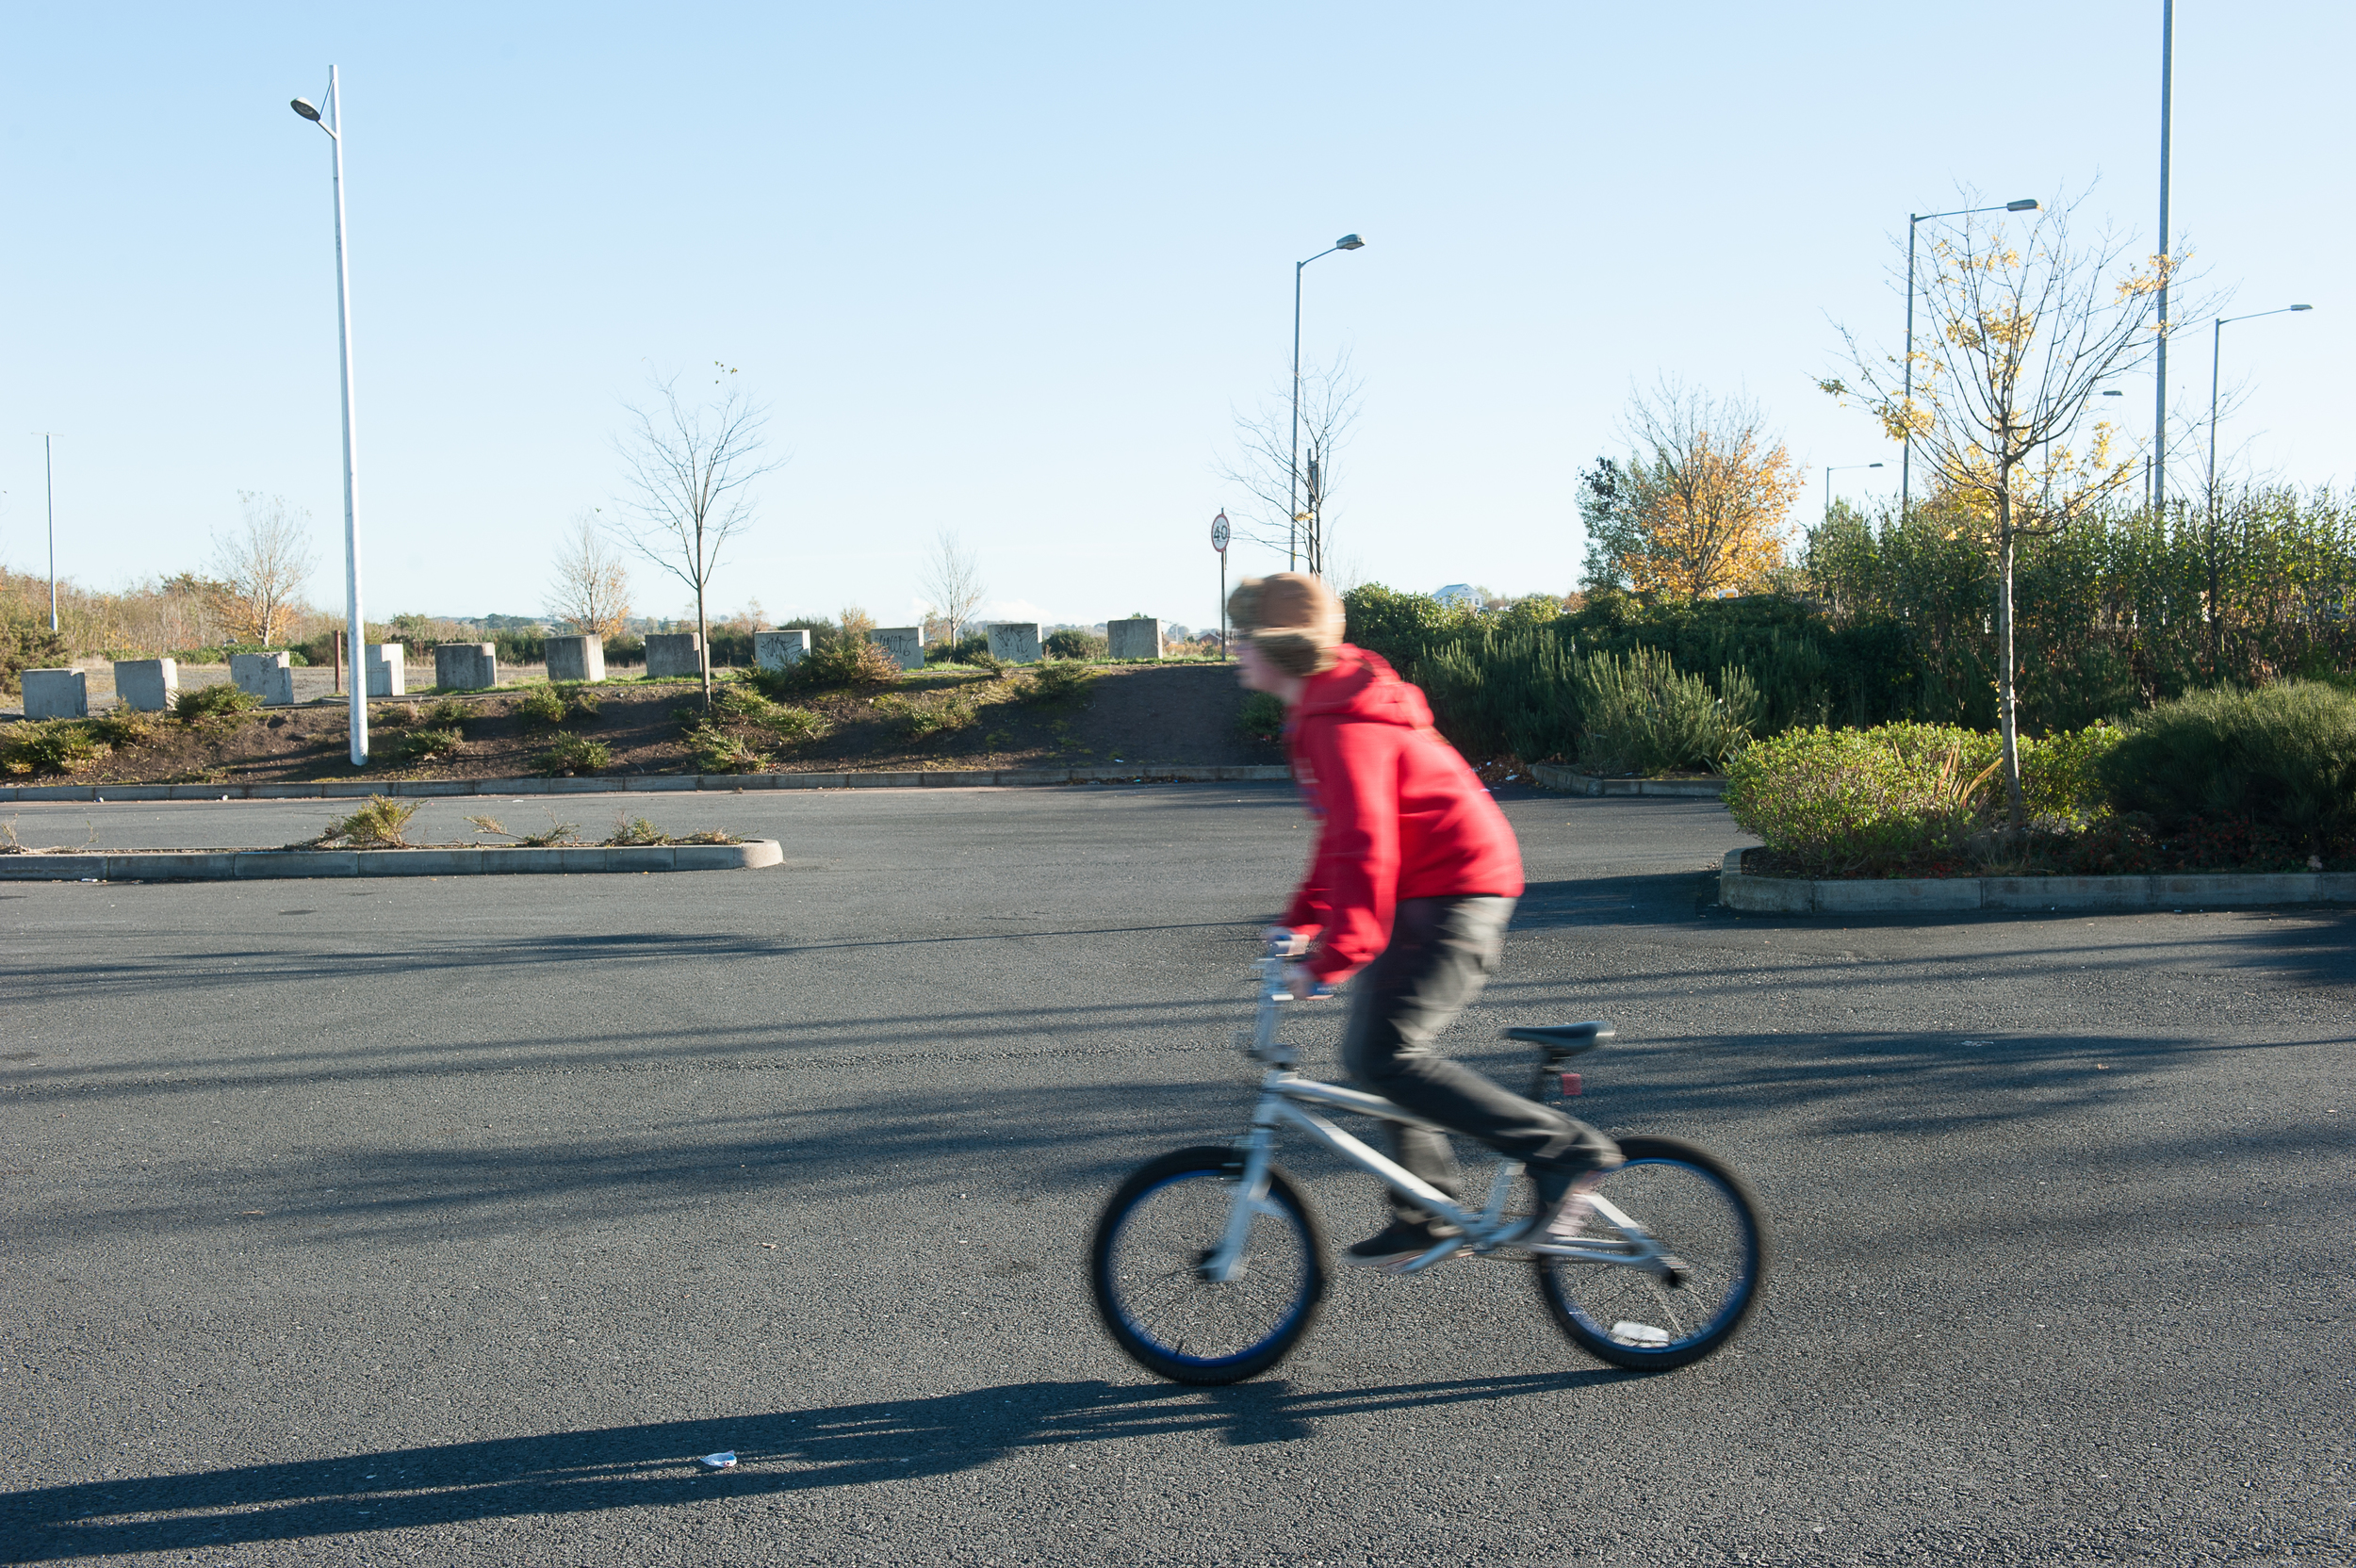
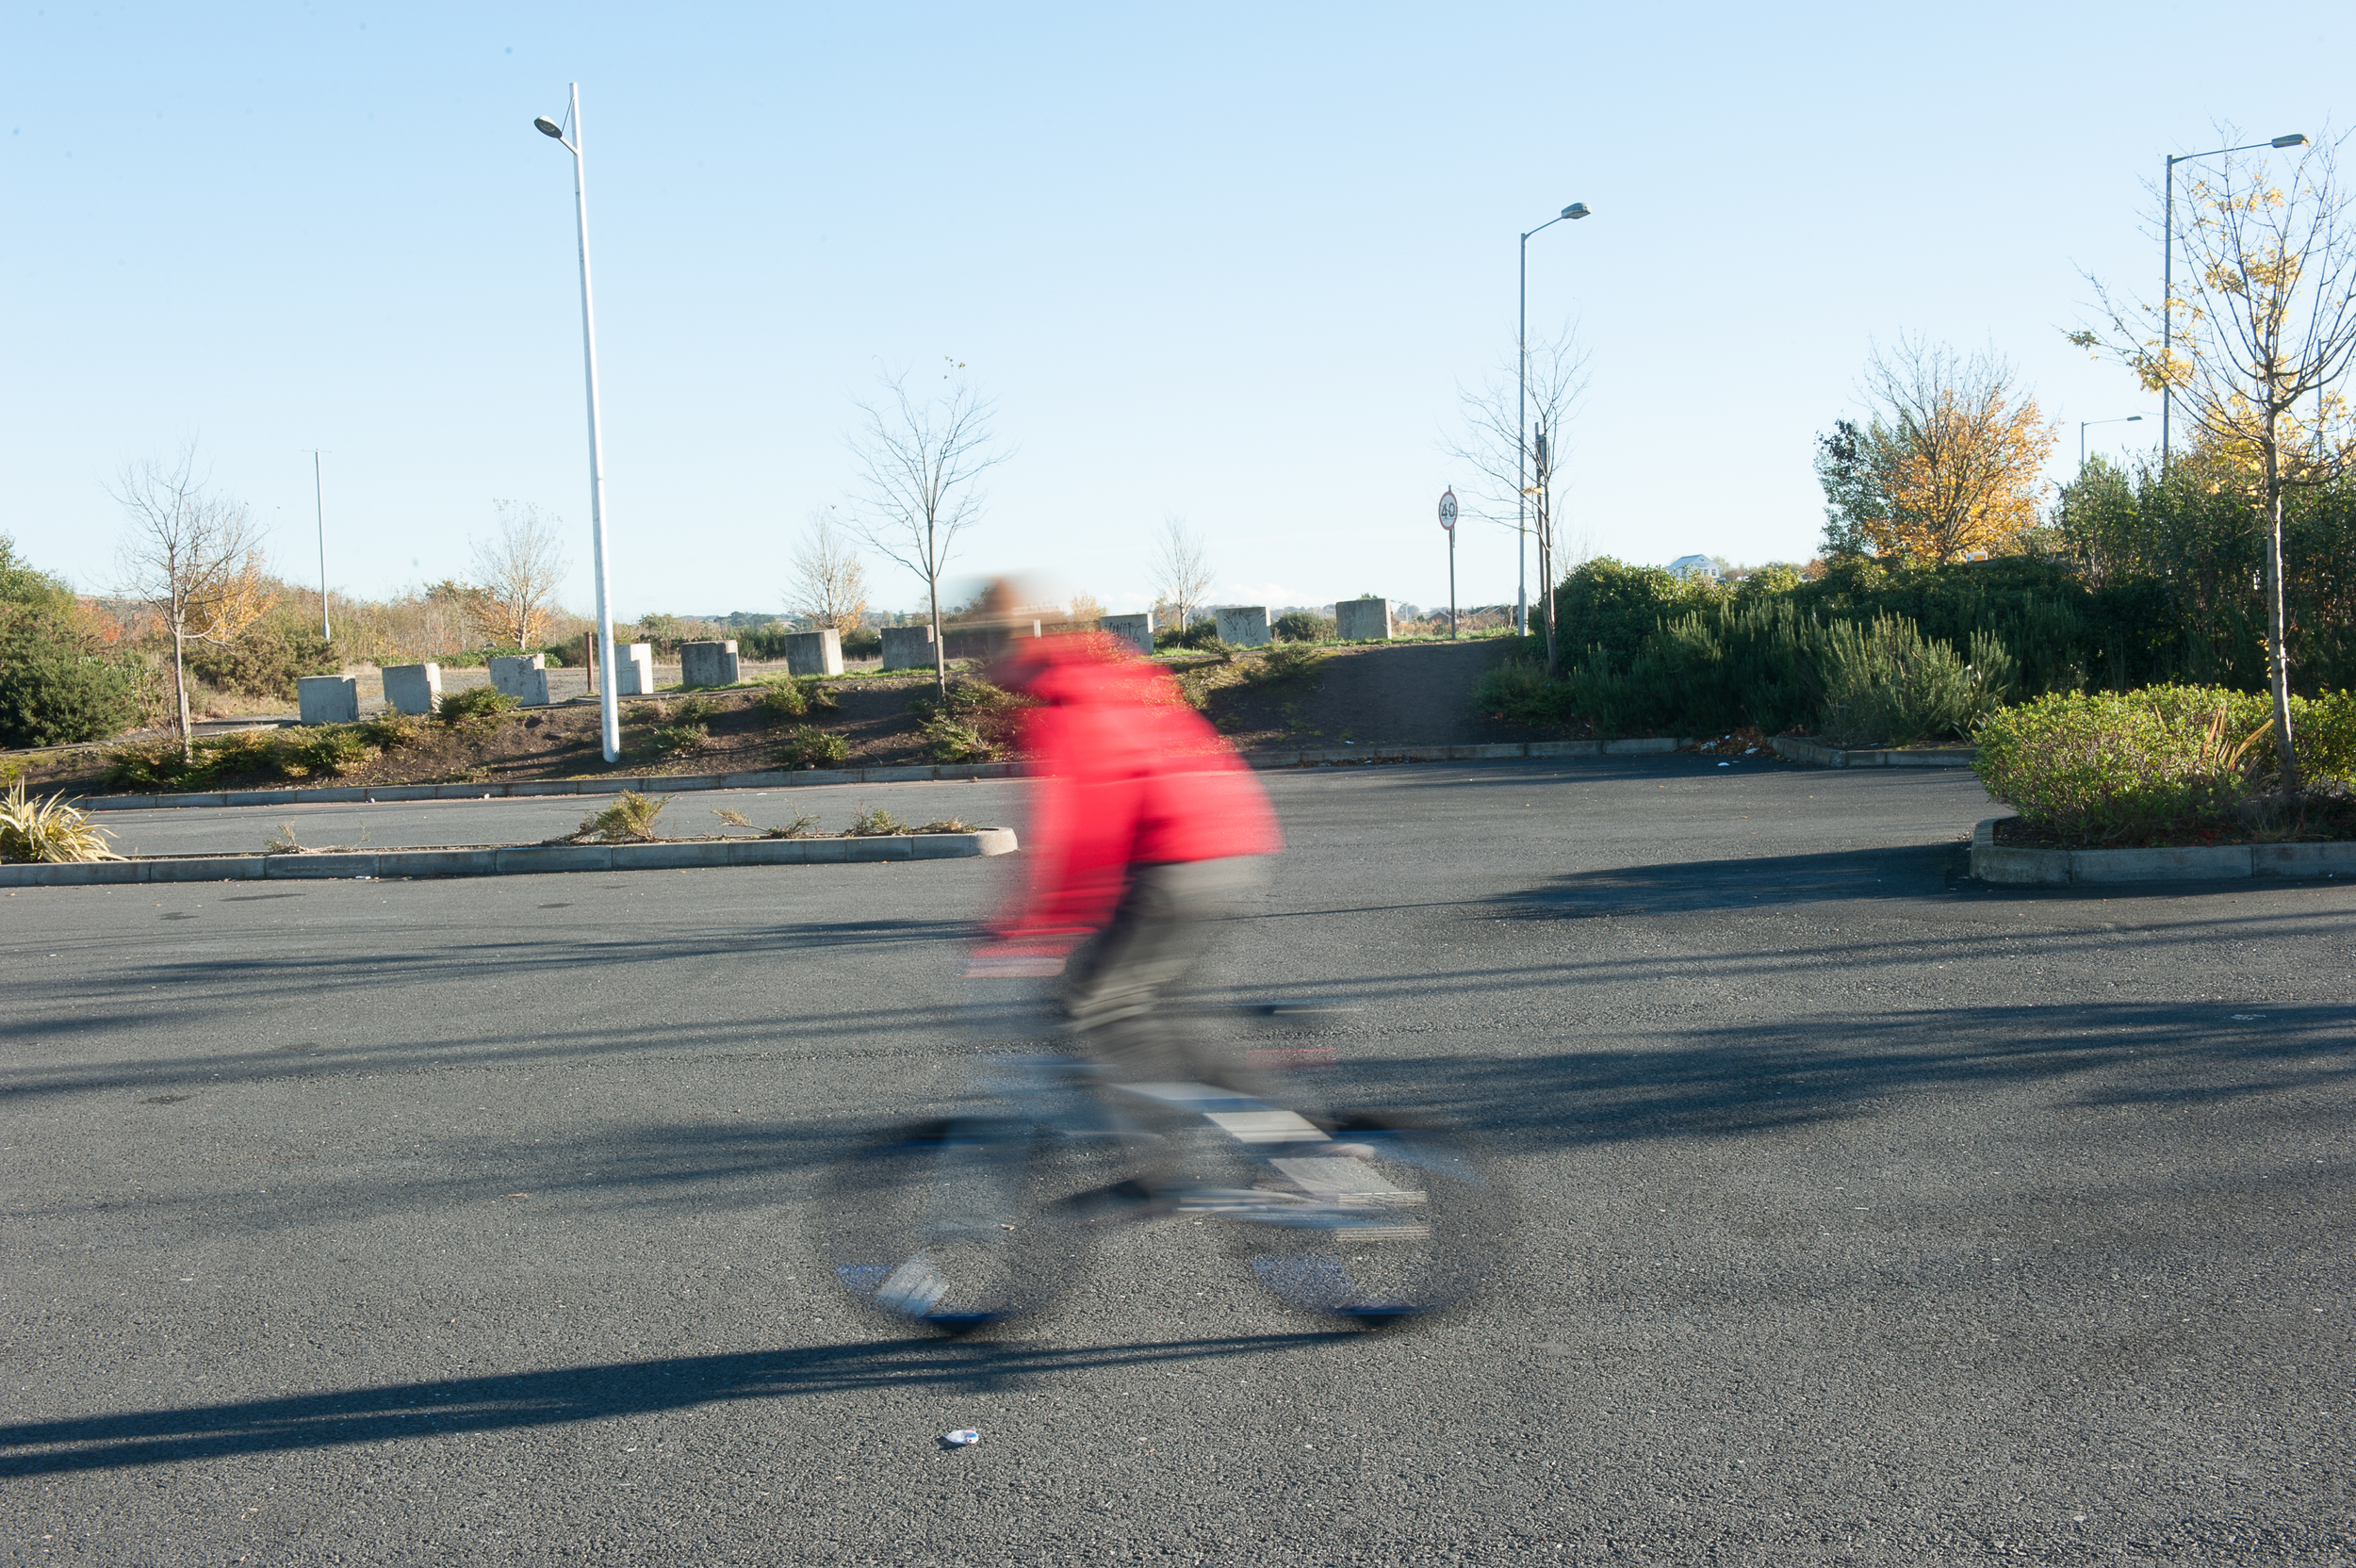
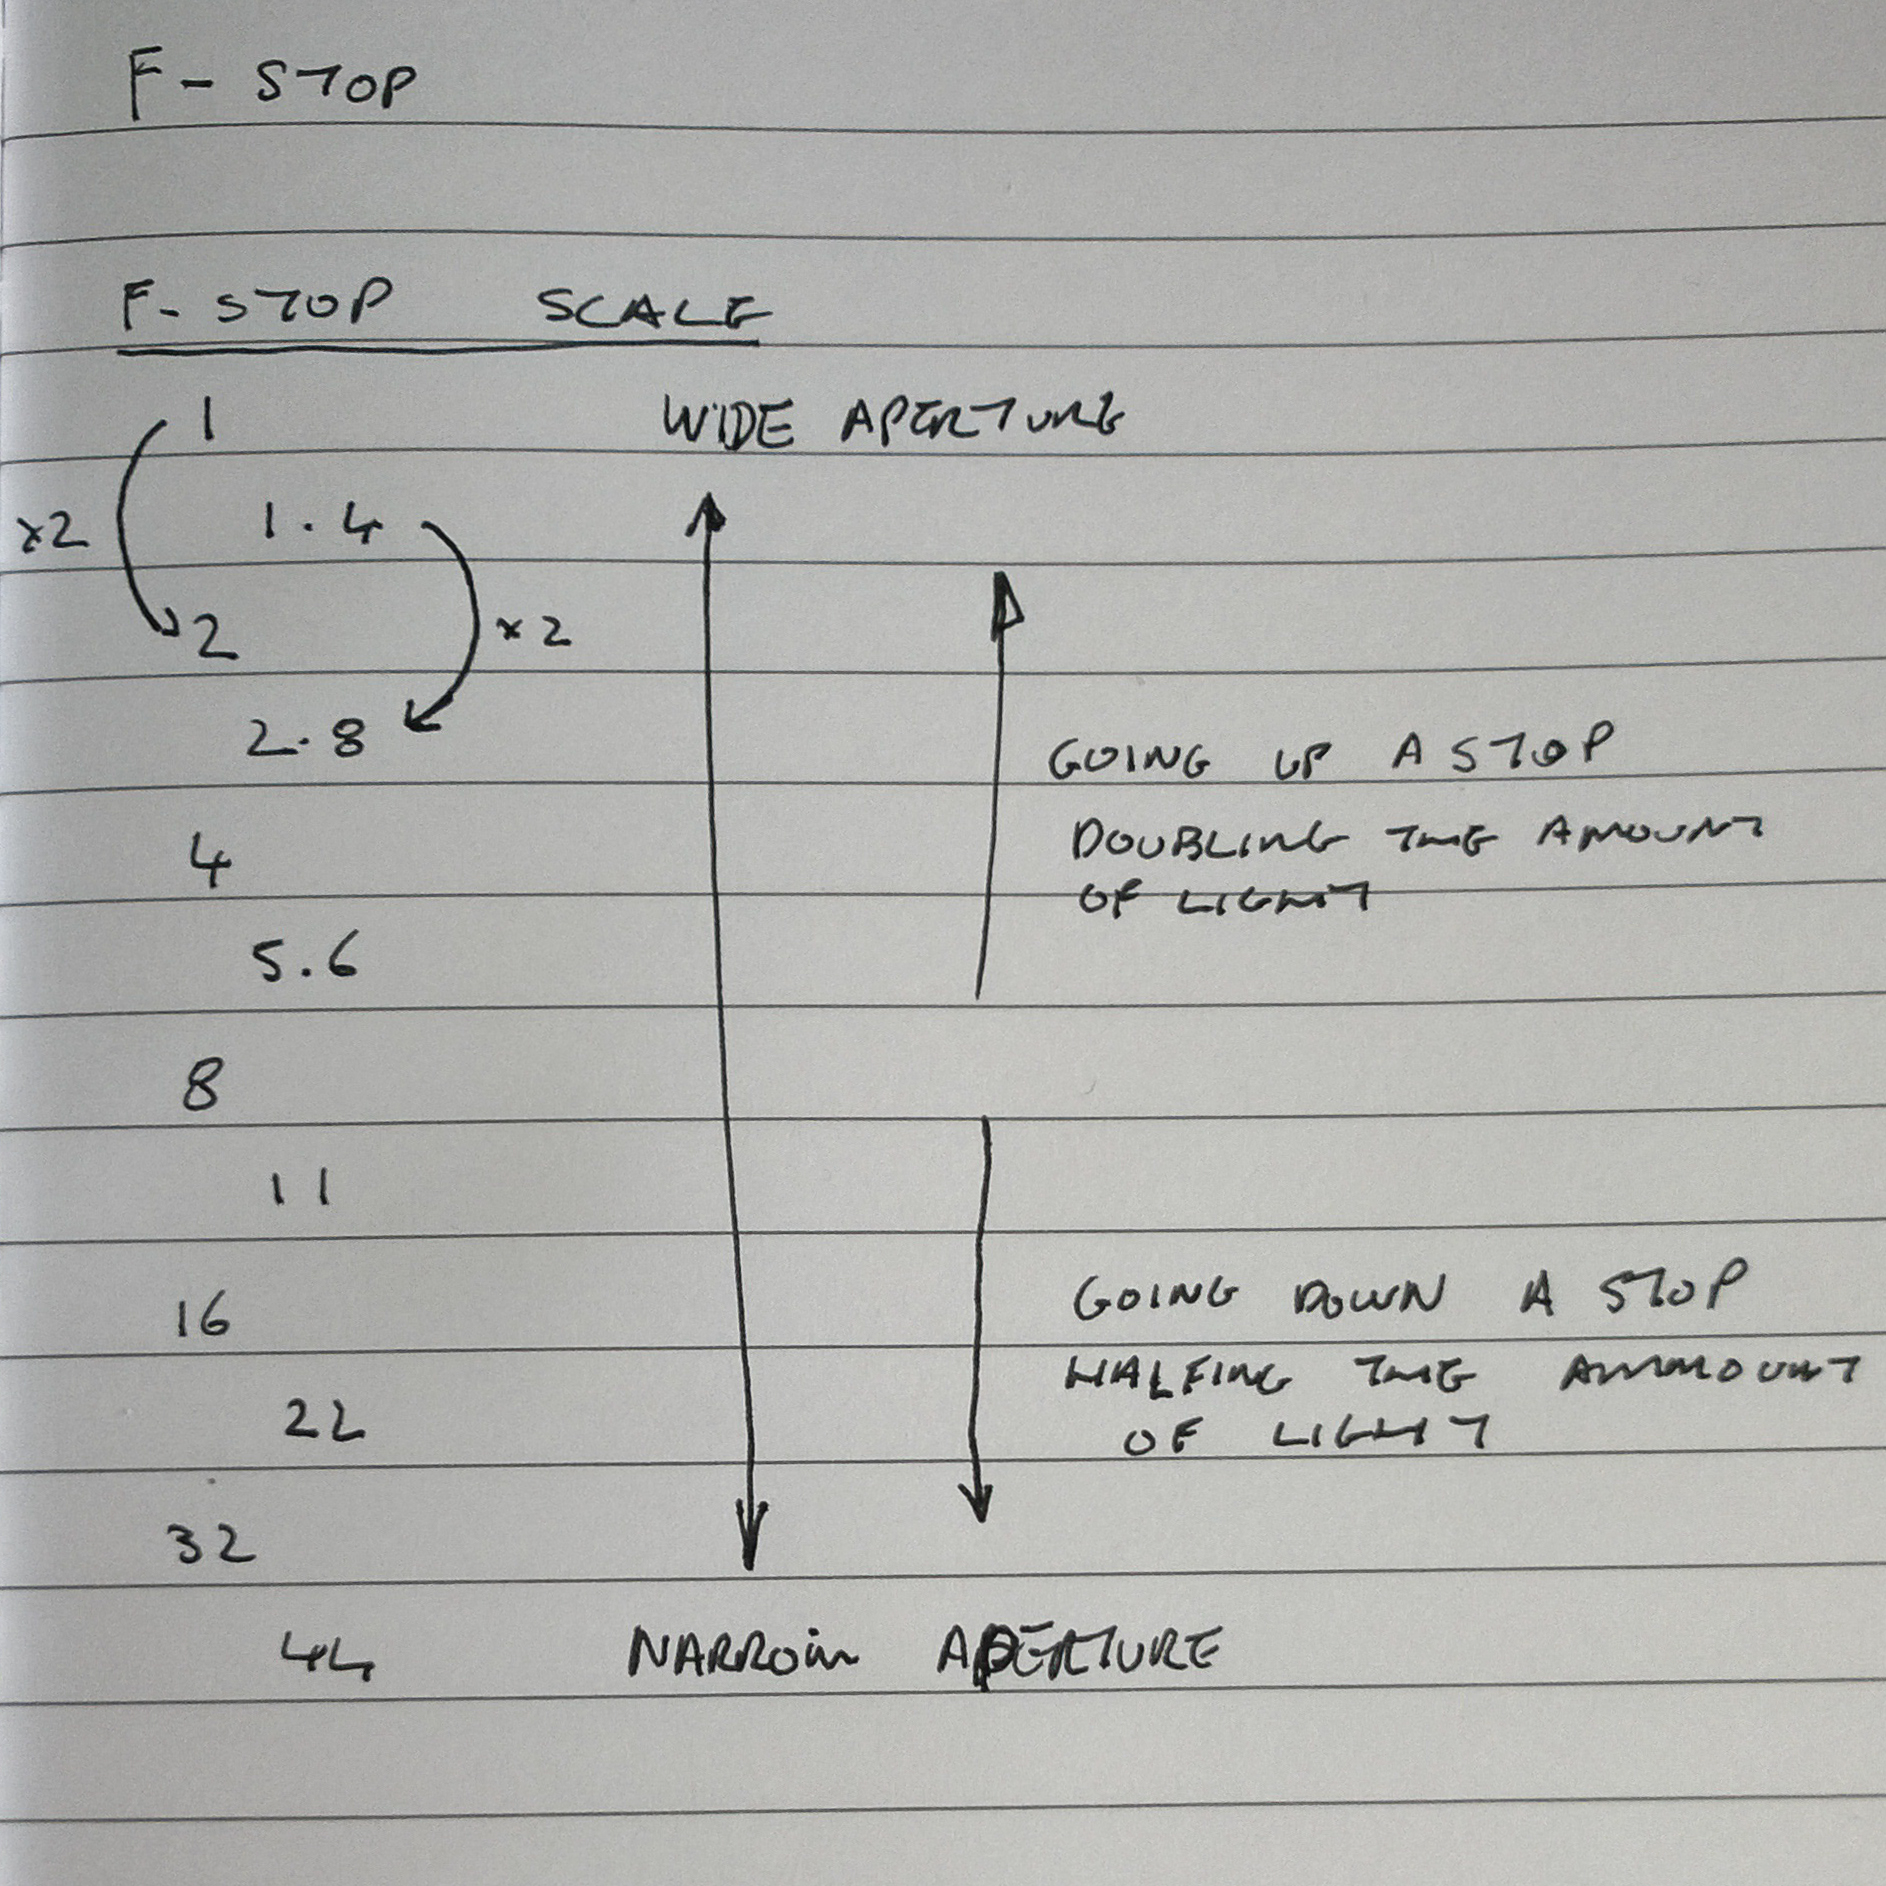
It took me a little while to get started the introductory phase of the course. There was reticence to do these exercises because having completed the GCSE and A-level in photography it felt like repetition. But I was glad that I took the time to do it, because it forced me to re-familiarise myself with concepts such as f-stop, depth of field, motion blur, aperture, ISO etc that I take for granted when using the camera.

if I was to assess my own progress so far I would say technically competent but not artistic. I am looking forward to part 1 on composition and hope to provide more aesthetically pleasing pictures while meeting the course requirements. I find this critical self-appraisal and reflection very difficult but I understand the necessity of not only doing, but reflecting upon what has been done, and learning from it.

I have started the blog which I am really enjoying. I like the structured approach to documenting my progress through the course work and I look forward to posting about the books I am reading for the course as well as other points of research, stuff about photographer, and events I will attend. I can really see high people become addicted to blogging. I am also keeping a log book were I can jot down my thoughts on notes on the exercises and assignments, but I’m not sure I would want anyone to see it.

I feel pleased that I have come through the introduction and actually have some coherent work to show for it. But there is still a nagging doubt that I’m going about things the wrong way, or I could be doing things better. I guess this is in part down to a lack of feedback but also my lack of experience in this model of education. In my previous experiences of education the lecturer or tutor is a constant presence and feedback is timely and sometimes presented whether you want it or not. In this type of self-study I haven’t yet become comfortable with the level of contact that is acceptable to have with the tutor.

What improvements am I going to make moving forward?

  • I am going to include a paragraph asking “what could I have done better?” In each exercise
  • I am going to have a little bit more contact with the tutor (this is really rather pleasant)
  • I am this is going to throw in some supplemental blogs i.e. book reviews, et cetera
  • increased velocity on the course work

Panning with different shutter speeds

The aim of this exercise was to use a panning technique whilst reducing the shutter speed for each incremental photograph and thus showing the effect of motion blur on the background. I remember trying this when I got my first digital SLR, and being extremely disappointed with the results. Coincidentally I was using exactly the same subject for that first attempt as I used for this exercise. As with the previous exercise or movement I took around 15 photographs but I will only use four to illustrate the point.

70mm---ISO 200---f/3.2 ---1/2000

I found the tripod method very difficult as the legs of the tripod were starting to collapse so I removed the camera and carried out the exercise handheld. As you can see from the photograph above the spokes are frozen, the cyclist is frozen, and there is no motion blur in the background. There is some level of blur in the background but this is due to the depth of field rather than the motion of the camera as it follows the cyclist. For this to be motion blur we would expect to see a streaked appearance as you will see in the later photographs. Motion is frozen due to very high shutter speed 1/2000 of a second.

70mm---ISO 200---f/13 ---1/100

It isn't until we get down to a shutter speed of 1/100 sec that we start to notice motion blur and the background, it is also interesting to note that at this speed we are also getting motion blur in the subject similar to the previous exercise (this can be seen on the spokes of the wheels).

70mm---ISO 200---f/22 ---1/40

In the third photograph another element of blur is added, that of “camera shake”. This is evident due to the fact that although the cyclist’s head isn’t moving with any great speed and should be captured as sharp due as a pan, it is clearly out of focus because hand movement becomes a factor at shutter speeds of less than 1/60 of a second.

70mm---ISO 200---f/22 ---1/20

In this fourth photograph we can clearly see a very pronounced effect of motion blur on the background. You will also note that the photograph is overexposed and this is because the camera has adjusted the f-stop to the f/22 but because the shutter speed is so low more light is heading the sensor and overexposing the image. We can also see the blurring of the spokes and the reflectors attached to the spokes and the winds themselves but there are is no streaking or deformation to the shape of the wheel because the camera is panning with the subject.

So which of the photos in the series that I prefer. The answer is they are all dreadful. As I was chimping at the back of the camera I realised they were all awful and decided that I wanted something better to finish this blog post on. So we moved closer to the buildings I asked the subject to increase his speed. The result is the photograph below which is probably exposed. The subject’s head is relatively sharp because the panning is reasonably accurate. The subject's legs and wheels are blurred due to the fast motion. The leather is tie on the hat flowing out behind the subject also adds to the sensation of speed in the photograph.

70mm---ISO 200---f/8 ---1/60

Shutter speeds.

The idea of this exercise was to demonstrate how motion blurs through the use of a fixed camera, moving subject, and ever increasing shutter speeds. The subject I decided to use was my son on his BMX bicycle. This was one way of getting him out from in front of his Xbox as well as helping me complete some of the syllabus. I set the camera to shutter priority to ensure a fairly consistent exposure through the series of photographs below. Although I took a series of 15 exposures I am only including 4 images on the blog to show the effect of increasing the shutter speed.

38mm---ISO 200---f/2.8 ---1/3200

In the photograph above the subject is in effect frozen in time, there are no discernible indications of movement. This is due to the very high shutter speed. The shutter mechanism, in this case, only lets light hit the sensor for 1/3200 of a sec (0.0003125 seconds). To facilitate enough light hitting the sensor to make a well exposed photograph, the camera has adjusted the aperture to f2.8 (i.e. wide open for the lens I was using). It was by setting up several cameras in a row with a fast shutter speed that Eadweard Muybridge was able to prove for the first time that all four horse’s feet come off the ground when it gallops

38mm---ISO 200---f/4.5 ---1/640

In the second image, the subject again appears to be frozen, but if you look at the spokes of the wheel (you may need to click on the photograph above and view the full-size image) you will see the spokes are starting to blur towards the outer edge of the wheel. This is starting to give the fact of movement but because the spokes are the only thing fast enough to be blurred at this point the effect is minimal.

38mm---ISO 200---f/10 ---1/125

In the third photograph the cyclist is starting to blur. In my opinion the effect is quite unpleasant and discordant with the rest of the photograph. In many cases for the most part as photographers we are striving for that pin sharp image so when we come across something like this it tends to be discarded.

It is not always the case that this level of blurring is unpleasant to examples of this being used to great effect are two iconic photographs by Henri Cartier Bresson. They are the man jumping across the puddle and the bicycle shot from the staircase. I think that in both of these photographs there is enough sharp interesting detail to show that the blur is intentionally there to emphasise the movement of the jumper and the cyclist, whereas in my photograph the only thing of interest is the cyclist so the blur is somewhat jarring to look at.

It is also worth noting here that the camera has reduced the aperture to an f-stop of F10 to counteract the effect of the slower shutter speed on the exposure.


38mm---ISO 200---f/22 ---1/25

In the fourth and final image, the subject is not only blurred but also distorted we can see the wheels are no longer circular, and the cyclist is almost smearing his way from right to left across the photograph.

In the fourth and final image, the subject is not only blurred but also distorted we can see the wheels are no longer circular, and the cyclist is almost smearing his way from right to left across the photograph, similar to the photograph of a racing car by Jacques Henri Lartigue. This is my favourite photograph of the sequence because although the subject is not in focus it is clear to the viewer that it is a picture of a cyclist moving quickly from right to left.

So what could have done better? As any estate agent will tell you “location location location” perhaps by giving the photograph a better background than an commercial car park it may have been a more interesting final product but the sequence of photographs meets the brief of the exercise.


Focus with a set aperture

For this exercise we were asked to take three photographs of a scene with depth, with a focal point at different depths in the scene. Unfortunately due to time pressures the photographs are not the most beautiful or interesting, but they do illustrate the concept of “Shallow depth of field” quite well. Focal Point deep in the photo.

Focal point at the mid point of the photo

Focal Point close to the camera

So which of the photographs do I prefer? It would have to be the first photograph were the focal point is deep in the photograph and the lamppost and building are sharp and in focus. It’s the most visually appealing photograph because compared to the other two there is more interesting subject matter in focus. The closer the focal point gets to the camera, the more the building and lamppost are thrown out of focus, and this makes for a less engaging photograph. That is not to say that the first photograph is an attention grabbing or show stopping image. Below you will see an portrait of my daughter were I have used a shallow depth of field and leading lines to draw attention to her as the subject of the photograph.

ellie-1001

I find a photograph of my daughter or interesting than the three above because; –

  1. it has my daughter in it
  2. it’s more colourful
  3. it hasn’t been taken to illustrate a technical point in photography
  4. I find people more interesting than lampposts.

Focal Length and Angle of View

This exercise had two parts, firstly we had to find the standard focal length of the lens, and secondly to use a zoom lens to show different angles of view. Standard focal length

So I got my trusty D 700 with the 24 to 70 F2 .8 and began holding it up to my right eye and intermittently closing my right and opening my left whilst zooming, to find the focal length which best matched what I saw with my naked eye. Common understanding amongst photographers is that the standard lens (i.e. that which is closest to your own vision) on a full frame camera is the 50 mm. I was very surprised to find that it was closer to 70 mm before both views were equal. So it became obvious to me that I would be zooming between wide and “standard” for the exercise as the lens is a 24mm to 70mm. So at this point in proceedings I grab my daughters Sony a200 with its 18 to 200 zoom lens. This would help me properly tackle the second part of the exercise, but the crop sensor on the a 200 may just add more confusion.

Angle of view

The scene I selected for the angle of view exercise was Stormont government buildings near Belfast. I set up the tripod firstly with the D 700 and took the following images at 24 mm, 50 mm, and 70mm.

Nikon D700 70mm

Nikon D700 50mm

Nikon D700 24mm

From where I was standing the 70 mm was definitely closest to what I saw with the naked eye. Then it was the turn of the Sony a 200 to take its place on the tripod. I shot images at 18 mm, 50 mm, and 200 mm.


Sony A200 200mm

Sony A200 50mm

Sony A200 18mm

If we compare the images side-by-side we start to see high focal length on the crop sensor differs from that on be a full frame sensor. The photographs on the right were taken with the Sony a 200, the crop frame camera.

Introduction_focal_d700-1000 SONY DSC

As you can see the photograph from the Nikon full frame camera taken at a focal length of 24 mm is wider in angle of view than the photograph from the Sony crop sensor camera taken at focal length of 18 mm (supposedly wider). So what becomes evident is that the full frame sensor gives you a much wider angle at the equivalent focal length. This becomes more obvious in the next two photographs as they are both taken at a focal length of 50 mm

Introduction_focal_d700-1001 SONY DSC

We can clearly see in the images above that the Nikon full frame gives a much wider angle than the Sony crop sensor at the same 50 mm focal length. In fact if you look at the photographs taken with the Nikon at 70 mm it has a similar angle of view as the photograph taken with the Sony at 50 mm

Introduction_focal_d700-1002 SONY DSC

I will return to this post and update it with the second part of this exercise were I will compare her prints of photographs at the place where those photographs were taken.

Getting to know your camera

Introduction-1002 Introduction-1003The The aim of the project was to get to know my camera better. I have a Nikon D700 Digital SLR camera. I have had the camera for around two years and have used it to shoot portraits and weddings as well as family photographs, so I am very familiar with the operation of the camera. I downloaded the manual from the Nikon website and set about the task of grinding through the 400 pages of highly technical information. It has to be said that this book is not a page turner filled with intricate plot twists and detailed characterisation. I managed to get through the sections on getting to know the camera, focus, release modes, ISO, exposure, white balance, and flash photography quite quickly as I am relatively familiar with how these work on the D700. Then the manual takes a turn for the worse as it gets into the "menu guide" section and starts to break down each menu item into much greater detail. This did give me a feel for what highly complex piece of equipment the camera is and the level of customisation available to professional photographers who want to have a suite of settings to use in particular situations. Many modern cameras have the ability to upgrade their firmware and my camera is no exception. Firmware upgrades provide bug fixes, new functionality, or give the camera the ability to operate with new accessories and equipment. This exercise prompted me to check and I was indeed several firmware versions behind. I simply follow the instructions in the manual, download the latest firmware, and upgraded the camera.

F-stop

This number is a ratio of focal length to Aperture. This means that you can be sure when you use the same f-stop regardless of the lens you are using, the same amount of light is hitting the sensor (or film) in the camera.

Introduction-1000

So using the f-stop ratio the higher the f-stop number the smaller the aperture and vice versa. Controlling the aperture is one of the ways we can control the amount of light hitting the sensor. By increasing the size of the aperture we increase the amount of light entering the camera. The amount of light is not the only thing affected by the aperture. Depth of field will also change when the aperture is changed.

We also have another method for controlling the amount of light hitting the sensor, and that is the shutter speed. The shutter is a mechanism that controls the amount of time that the sensor is exposed to light. We can have that widest aperture imaginable but no light will hit the sensor unless we activate the shutter. The longer the shutter speed, the more time the sensor is exposed to the light entering the camera. By combining these two elements we get exposure. There is a third element of exposure which has become more prominent with the advent of digital photography, and that is ISO. With film cameras you selected your film based on the conditions you thought you would be shooting in. So if you’re shooting outside on a bright sunny day, you would select a film with a low ISO. You would therefore be stuck with that ISO for the number of exposures on that film. On digital cameras ISO is a measure of the sensitivity of the sensor and can be adjusted for each shot if necessary. The higher the ISO number the more sensitive the sensor.