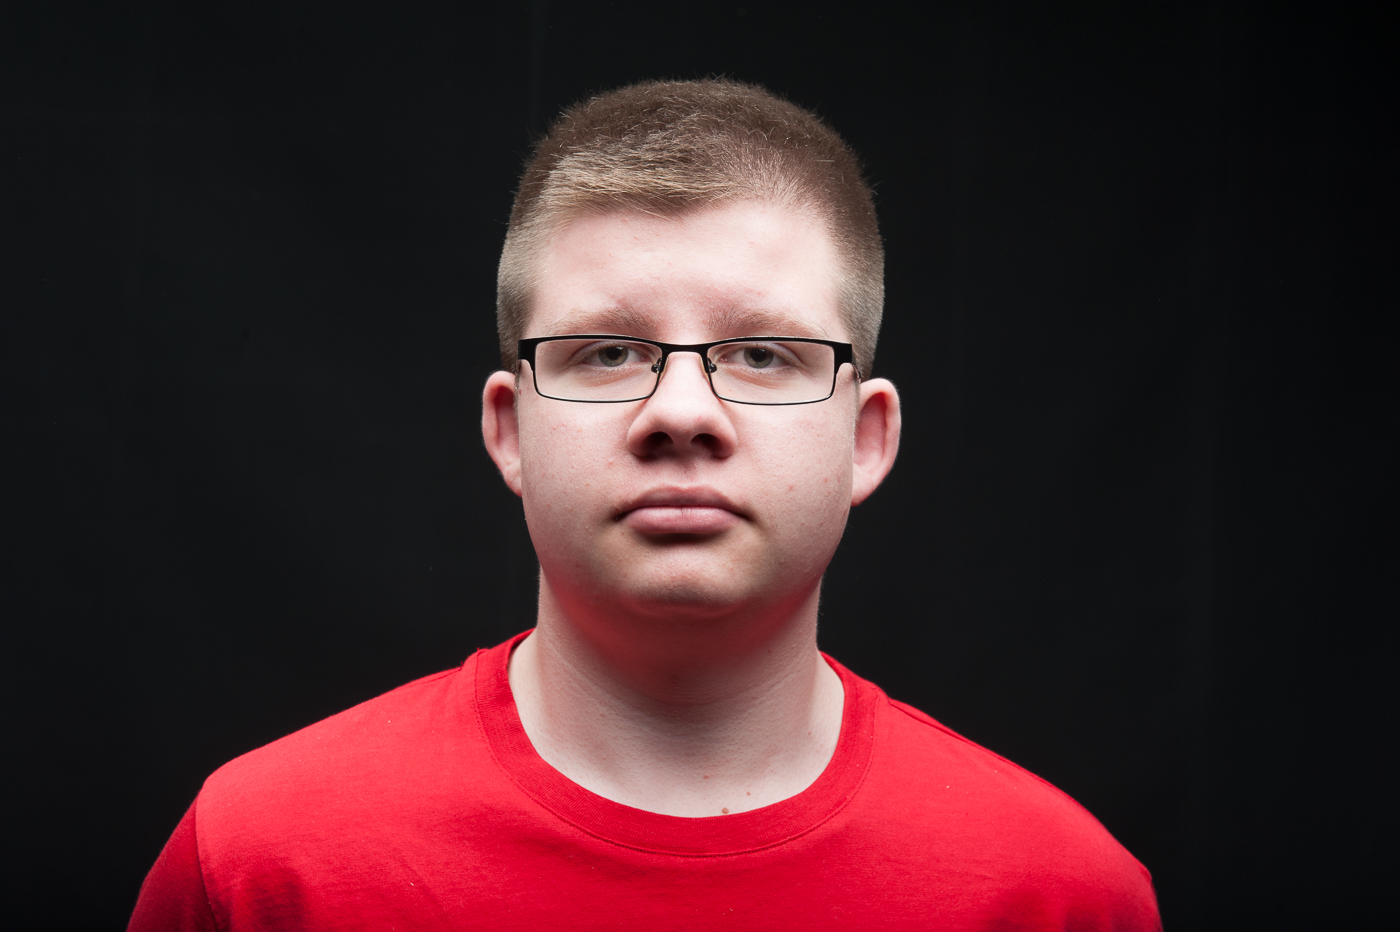
The aim of this exercise was to take shots using the various lighting positions and angles below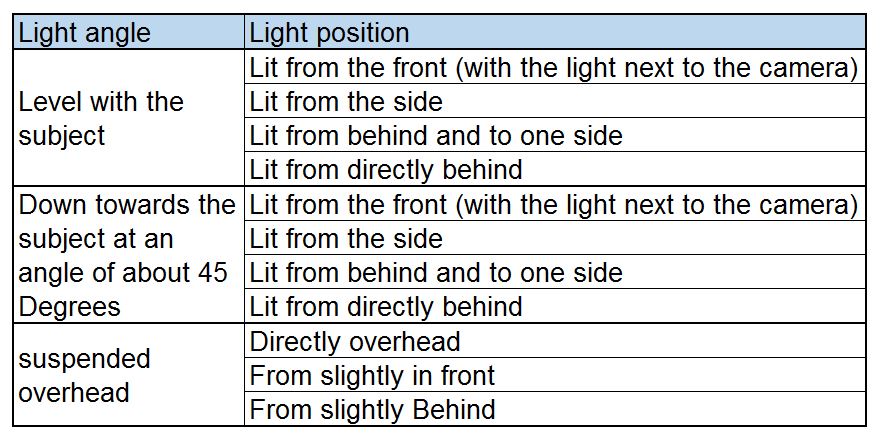
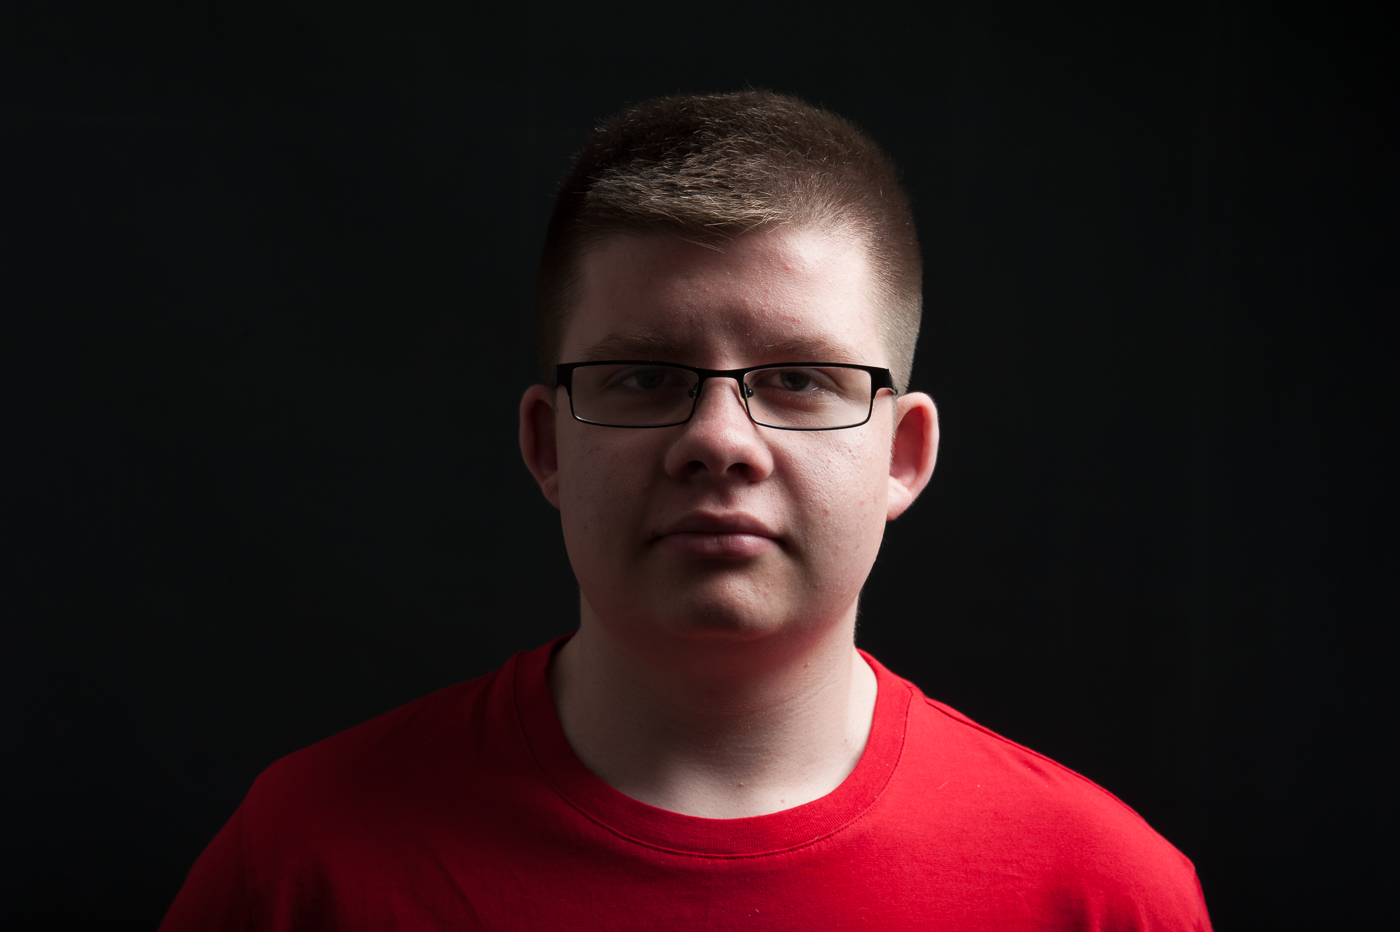
Light Level with the subject - Lit from the front (with the light next to the camera)

due to the size of light modifier being used (a large soft box) it was very difficult to shoot directly from the front so there is a slight angle to the lighting in this photo. The effect of having the light level with the subject and directly in front is to give the image a very flat 2 dimensional appearance.
Light Level with the subject - Lit from the side

With the light at 90 degrees to the subject the face is half in light and half in darkness. the studio wall was acting like a large reflector so the right side of the subjects face is not totally in darkness.
Light Level with the subject - Lit from behind and to one side

moving the light further to the back lights even less of the subjects face but does give more of a feel to the contours of the face.
Light Level with the subject - Lit from directly behind
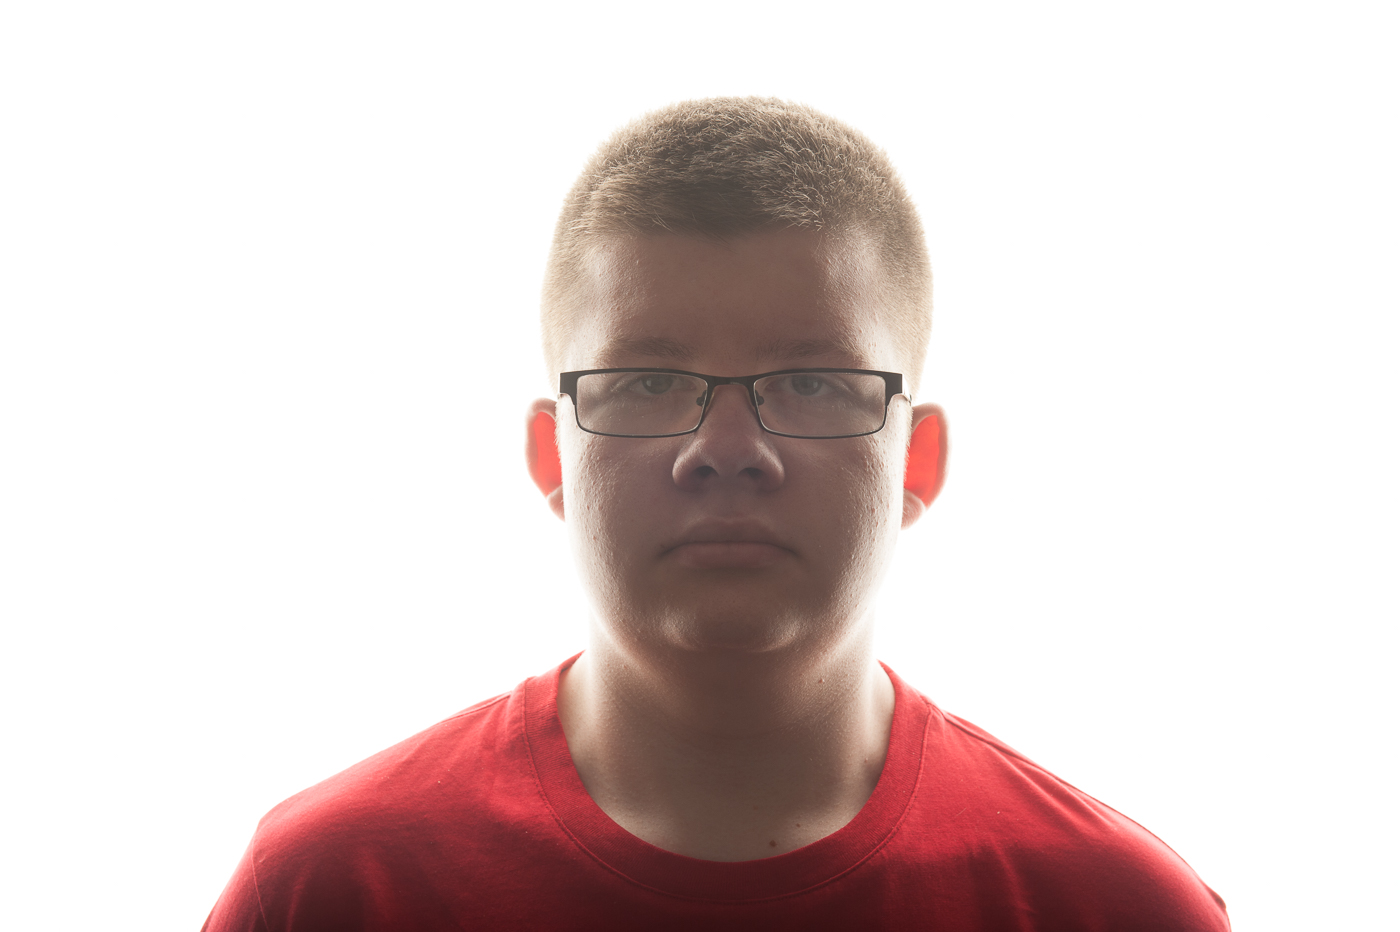
I really like this effect. because of the size of the soft box light is almost spilling round the subject and emphasising the shape of the head. There is definitely a more 3D feel to this photo
Light Down towards the subject at an angle of about 45 Degrees - Lit from the front (with the light next to the camera)

this is a similar setup to photo 1 except the light is above and at 45 degrees. again the top half of the subjects face is fully lit and therefore somewhat flat in appearance but the shadows below the nose and chin give a little shape to the shot
Light Down towards the subject at an angle of about 45 Degrees - Lit from the side
The face is almost 3/4 in darkness and although the shadows show lots of the facial contours it is not a particularly pleasing photo
Light Down towards the subject at an angle of about 45 Degrees - Lit from behind and to one side

Moving the light even further behind the lights even less of the subject and leaves the face almost in total darkness
Light Down towards the subject at an angle of about 45 Degrees - Lit from directly behind

I really like the edge lighting effect in this shot and how the light falls on the subjects shoulders.
Light suspended overhead - Directly overhead

I have never used lighting directly from above before and the effect was unusual again similar to photograph 5 the shadows on the underside of the nose and chin give some shape but in this picture the texture of the tee shirt is much more emphasised.
Light suspended overhead - From slightly in front
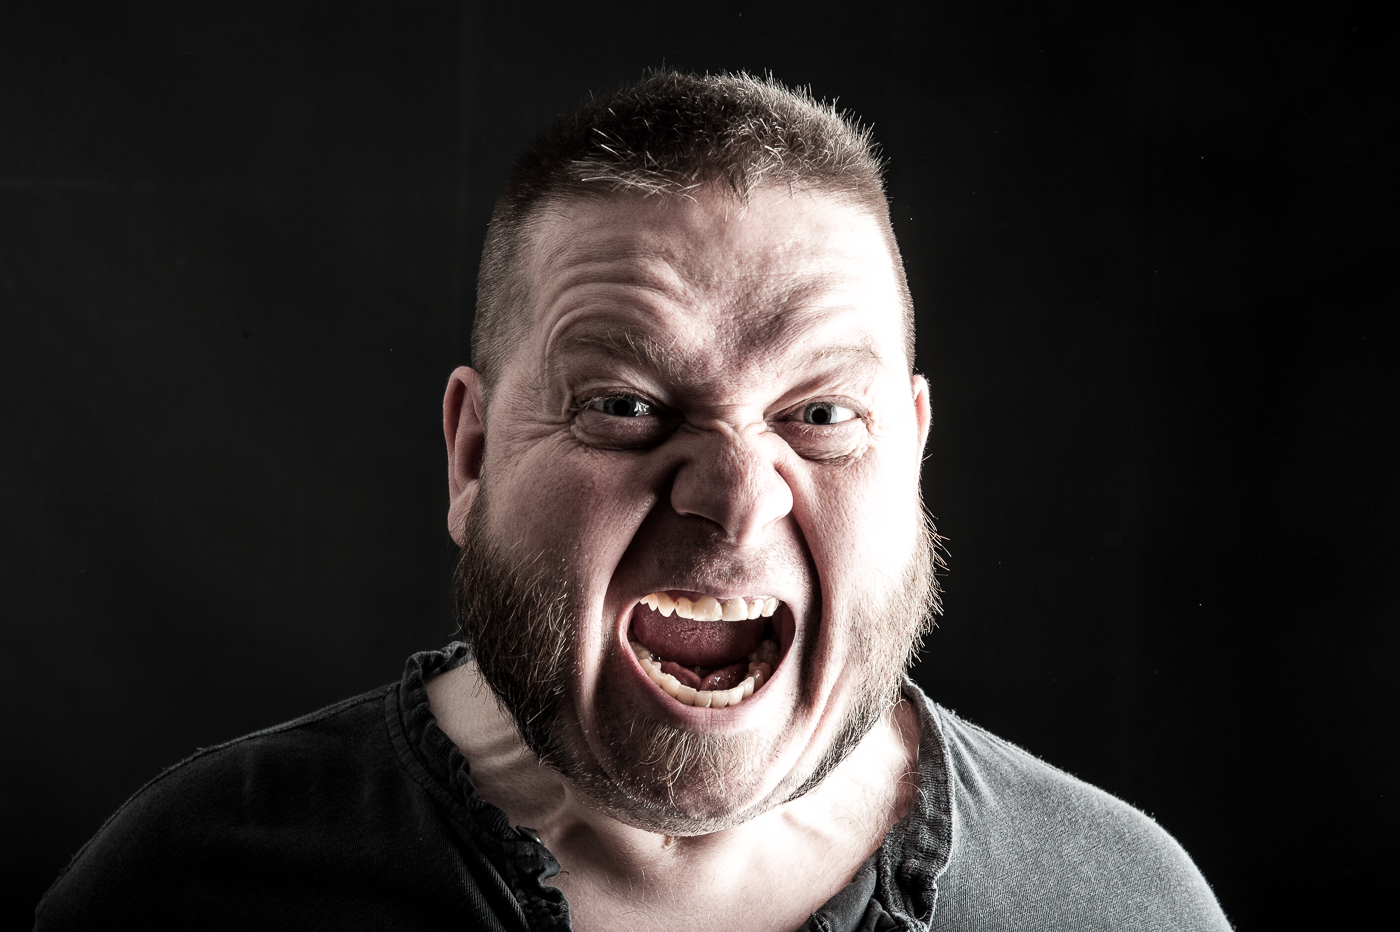
This was my favorite portrait of the day. the texture of the hair and tee-shirt are great, the subject is definitely not flat and the shadows slim the face somewhat. Light suspended overhead - From slightly Behind

Again a lot of the subject is in darkness and it is not a particularly pleasing photo.
Reflection
I was surprised by the different effects created by moving the light around. I have used a single studio light many times but I have not varied the angle and position as much. I can see by combining numerous lights and angles you could lose a day in creative lighting experiments. It was a great way to spend a couple of hours and we stayed and created a few nice portraits using a single light.