OCA TaoP

OCA degree in photography module 1

The lighting angle

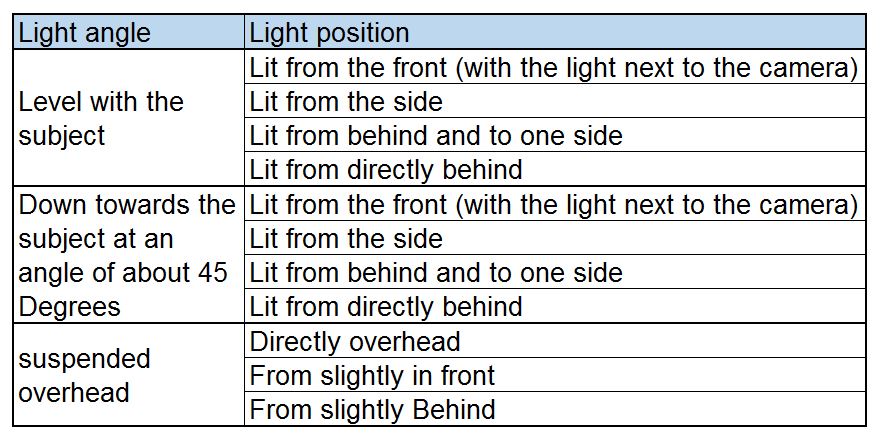
  The aim of this exercise was to take shots using the various lighting positions and angles belowshots
 

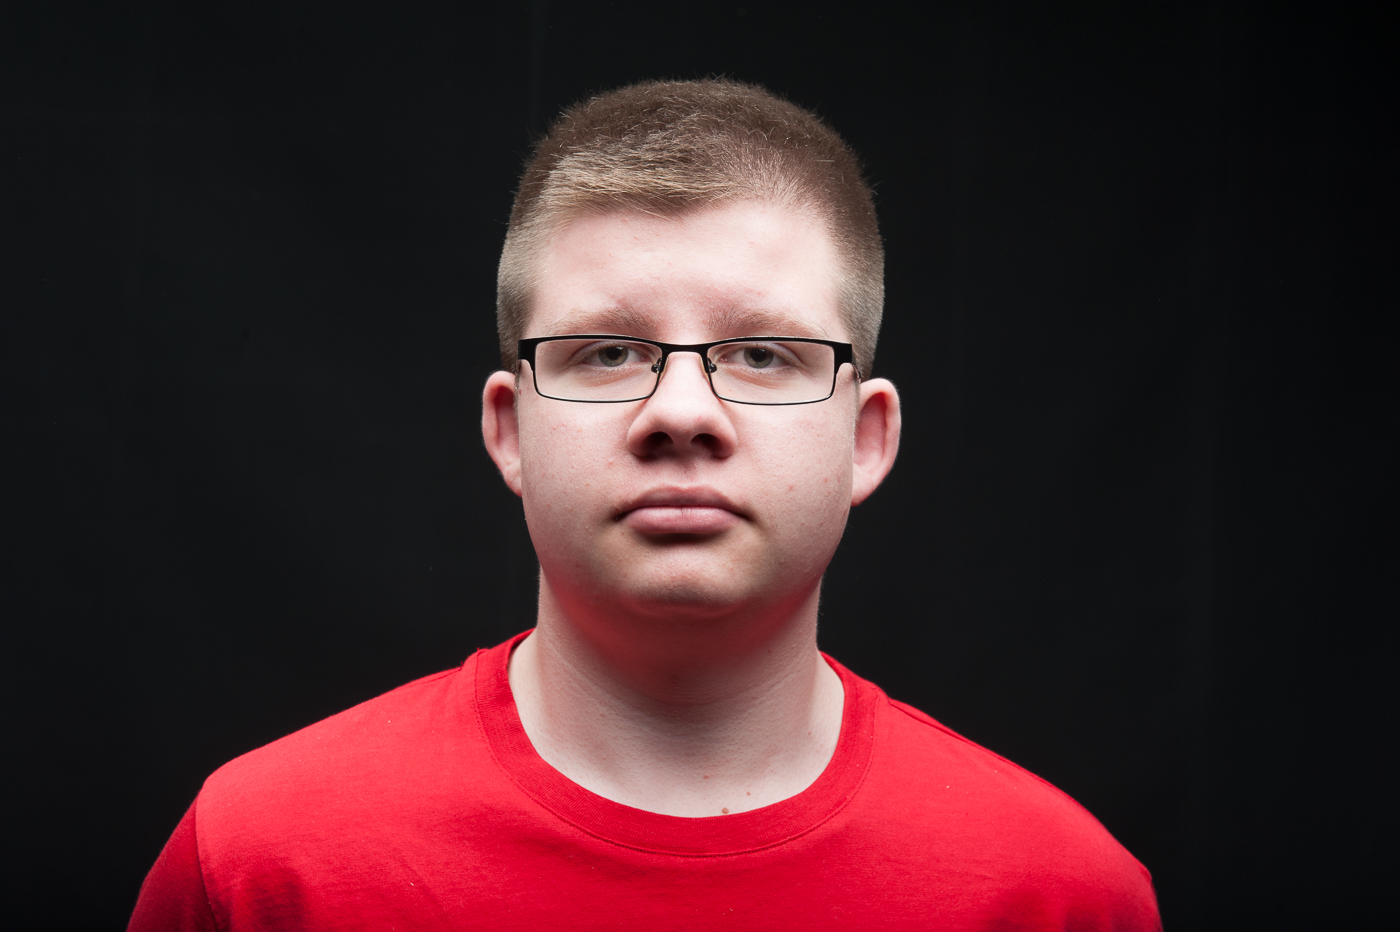
Light Level with the subject - Lit from the front (with the light next to the camera)

The lighting angle small-0637

due to the size of light modifier being used (a large soft box) it was very difficult to shoot directly from the front so there is a slight angle to the lighting in this photo. The effect of having the light level with the subject and directly in front is to give the image a very flat 2 dimensional appearance.

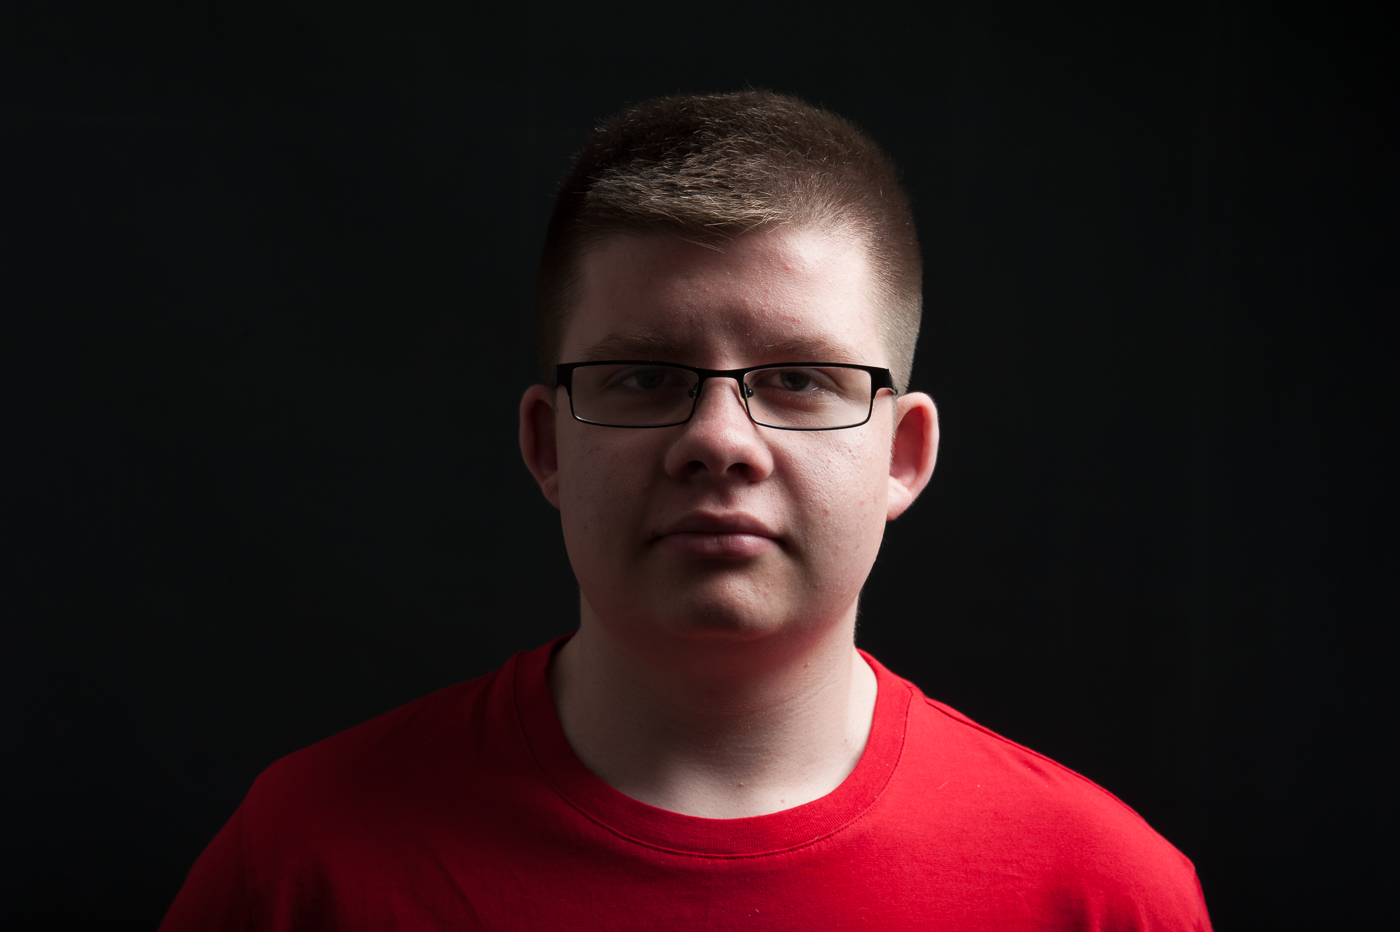
Light Level with the subject - Lit from the side

The lighting angle small-0640

With the light at 90 degrees to the subject the face is half in light and half in darkness. the studio wall was acting like a large reflector so the right side of the subjects face is not totally in darkness.

Light Level with the subject - Lit from behind and to one side

The lighting angle small-0644

moving the light further to the back lights even less of the subjects face but does give more of a feel to the contours of the face.

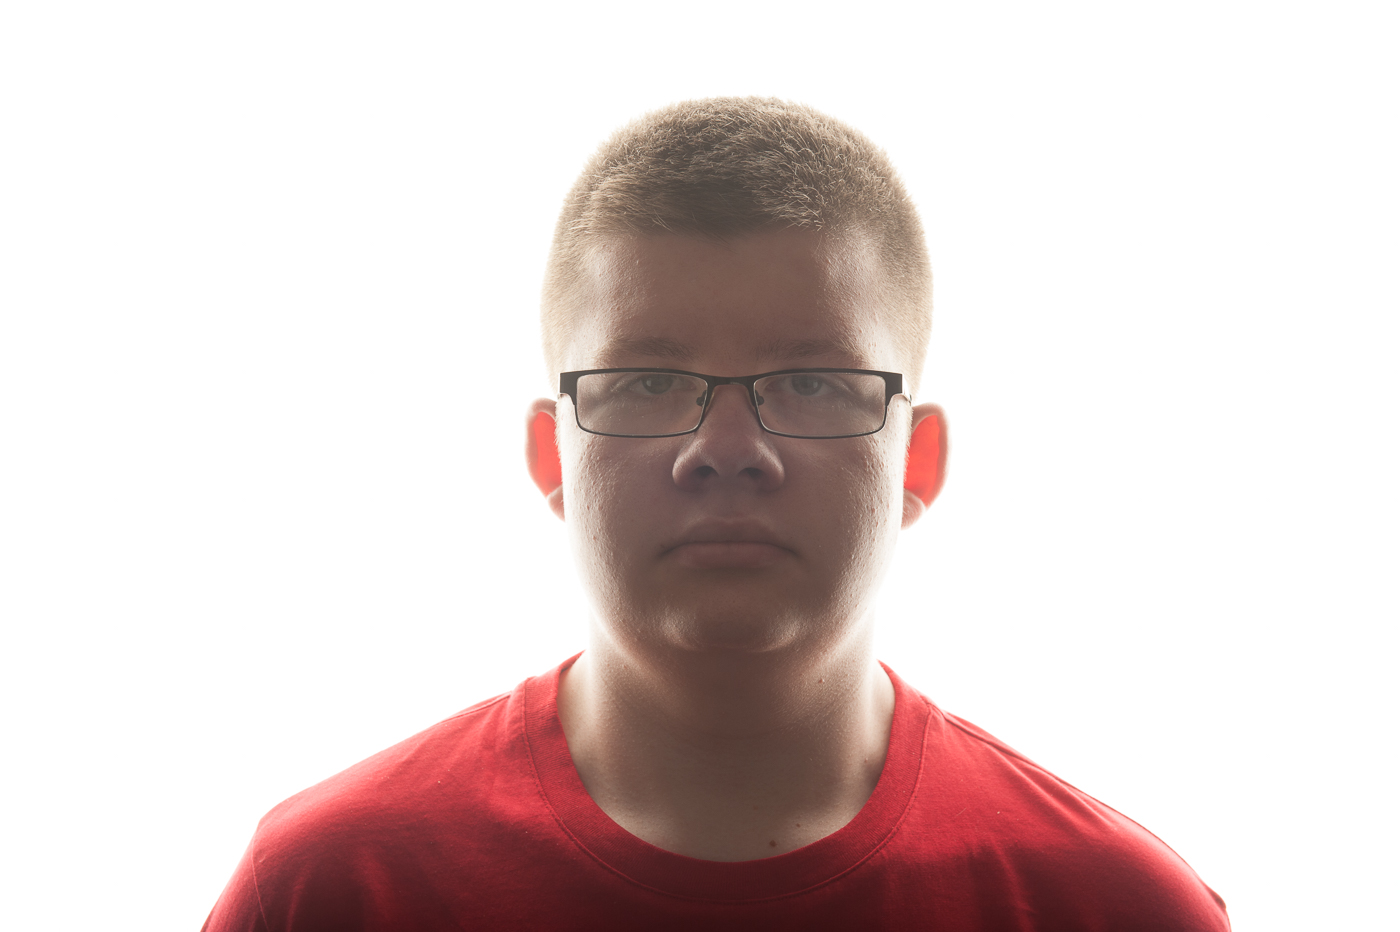
Light Level with the subject - Lit from directly behind

The lighting angle small-0648

I really like this effect.  because of the size of the soft box light is almost spilling round the subject  and emphasising the shape of the head. There is definitely a more 3D feel to this photo

Light Down towards the subject at an angle of about 45 Degrees - Lit from the front (with the light next to the camera)

The lighting angle small-0611

this is a similar setup to photo 1 except the light is above and at 45 degrees. again the top half of the subjects face is fully lit and therefore somewhat flat in appearance but the shadows below the nose and chin give a little shape to the shot

Light Down towards the subject at an angle of about 45 Degrees - Lit from the side

The lighting angle small-0618


The face is almost 3/4 in darkness and although the shadows show lots of the facial contours it is not a particularly pleasing photo

Light Down towards the subject at an angle of about 45 Degrees - Lit from behind and to one side

The lighting angle small-0623


Moving the light even further behind the lights even less of the subject and leaves the face almost in total darkness

Light Down towards the subject at an angle of about 45 Degrees - Lit from directly behind

The lighting angle small-0629

I really like the edge lighting effect in this shot and how the light falls on the subjects shoulders.

Light suspended overhead - Directly overhead

The lighting angle small-0608

I have never used lighting directly from above before and the effect was unusual again similar to photograph 5 the shadows on the underside of the nose and chin give some shape but in this picture the texture of the tee shirt is much more  emphasised.

Light suspended overhead - From slightly in front

The lighting angle small-0609

This was my favorite portrait of the day. the texture of the hair and tee-shirt are great, the subject is definitely not flat and the shadows slim the face somewhat. Light suspended overhead - From slightly Behind

The lighting angle small-0610


Again a lot of the subject is in darkness and it is not a particularly pleasing photo.

Reflection

I was surprised by the different effects created by moving the light around. I have used a single studio light many times but I have not varied the angle and position as much.  I can see by combining numerous lights and angles you could lose a day in creative lighting experiments. It was a great way to spend a couple of hours and we stayed and created a few nice portraits using a single light.


The lighting angle small-0662 The lighting angle small-0669 The lighting angle small-0681 The lighting angle small-0686 The lighting angle small-0687 The lighting angle small-0626 The lighting angle small-0635


Softening the light

The brief for the exercise was as follows Set up a still-life arrangement, with any object or group of objects. The lighting direction will depend on your subject, and you might like to experiment but, if in doubt, fix the naked lamp more or less overhead, pointing down. (I am assuming that the camera is aimed at a slight angle downwards.)

Using a diffused light source to soften the shadows and highlights take two photographs, one with just the naked lamp, the other with the translucent material held between the lamp and your subject (but out of view). The two exposure settings will be different.

Look at the results, and write down exactly what you see as the differences. Look, for instance, at the strengths (blackness) of the shadows, their extent, and the hardness of their edges. Look also at the highlights, and at the contrast. Finally, was the diffusion an improvement? Record your answer.

To carry out the exercise I hired some time in a studio. I rummaged around the studio to find Items i could use in a still life and then used a single light from above at a 45 degree angle.  To soften the light I shot through a translucent reflector  the results can be seen below.

Softening the light Small-0550 Softening the light Small-0552


I should point out that one thing I did wrong was not having the camera on the tripod, this would have eliminated any doubt that differences in the photographs are down to differing camera angles.  The first photo is the "un-softened" direct light shot.  We can see that the the shadows are darker and more defined and also the colours are more saturated than in the second shot. In short the first photo has more contrast.

"A light source has high contrast if its rays all strike the subject from nearly the same angle. Light rays from a low-contrast source strike the subject from many different angles. Sunlight on a clear day is a common example of a high-contrast light source." (Hunter, Fuqua and Biver, 2012, p19). The unmodified light source has a more direct rays off light than the diffused light source. It is not only the shadows which are affected by introducing the diffuser, the reflected highlights also differ between the photographs, in the second shot they are larger and with less defined edges.

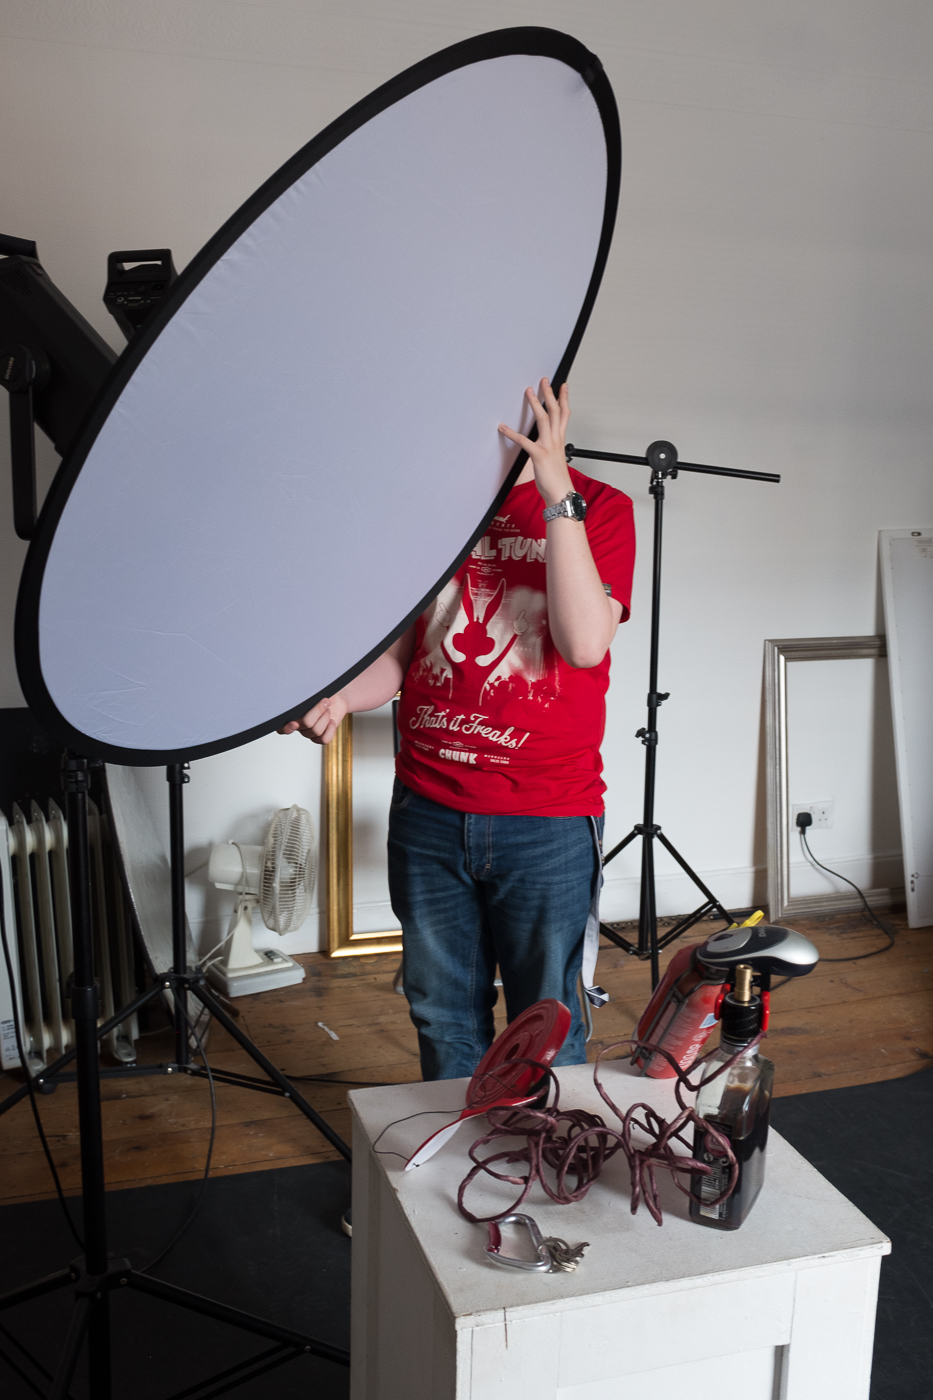
I have included a shot of the setup (NB offspring make excellent reflector stands)

Softening the light Small setup-9450

Variety with a low sun

The first requirement for this exercise was to shoot when the sun was low in the sky, this is commonly known as golden hour.

Golden Hour is quite simply when the sun is low in the sky. The end-points are sunrise and sunset, but the maximum height is a little vague. It’s when the sunlight in clear sky is yellow-to-orange, and that’s approximately below 20º above the horizon. (Freeman 2014, p. 94)

The second requirement was to produce an example of front lighting, back lighting, side lighting and edge lighting.

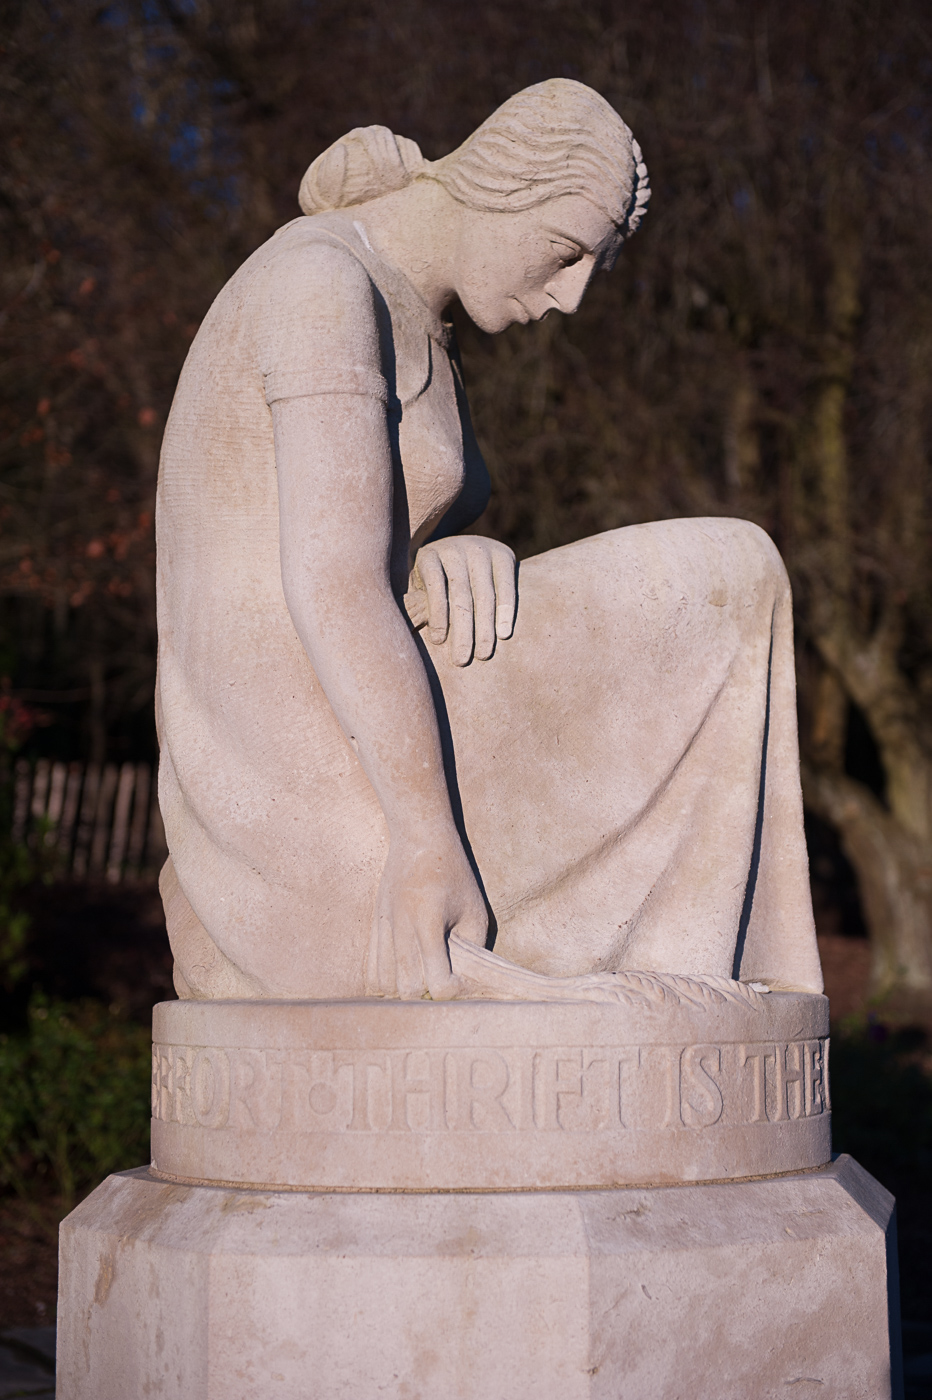
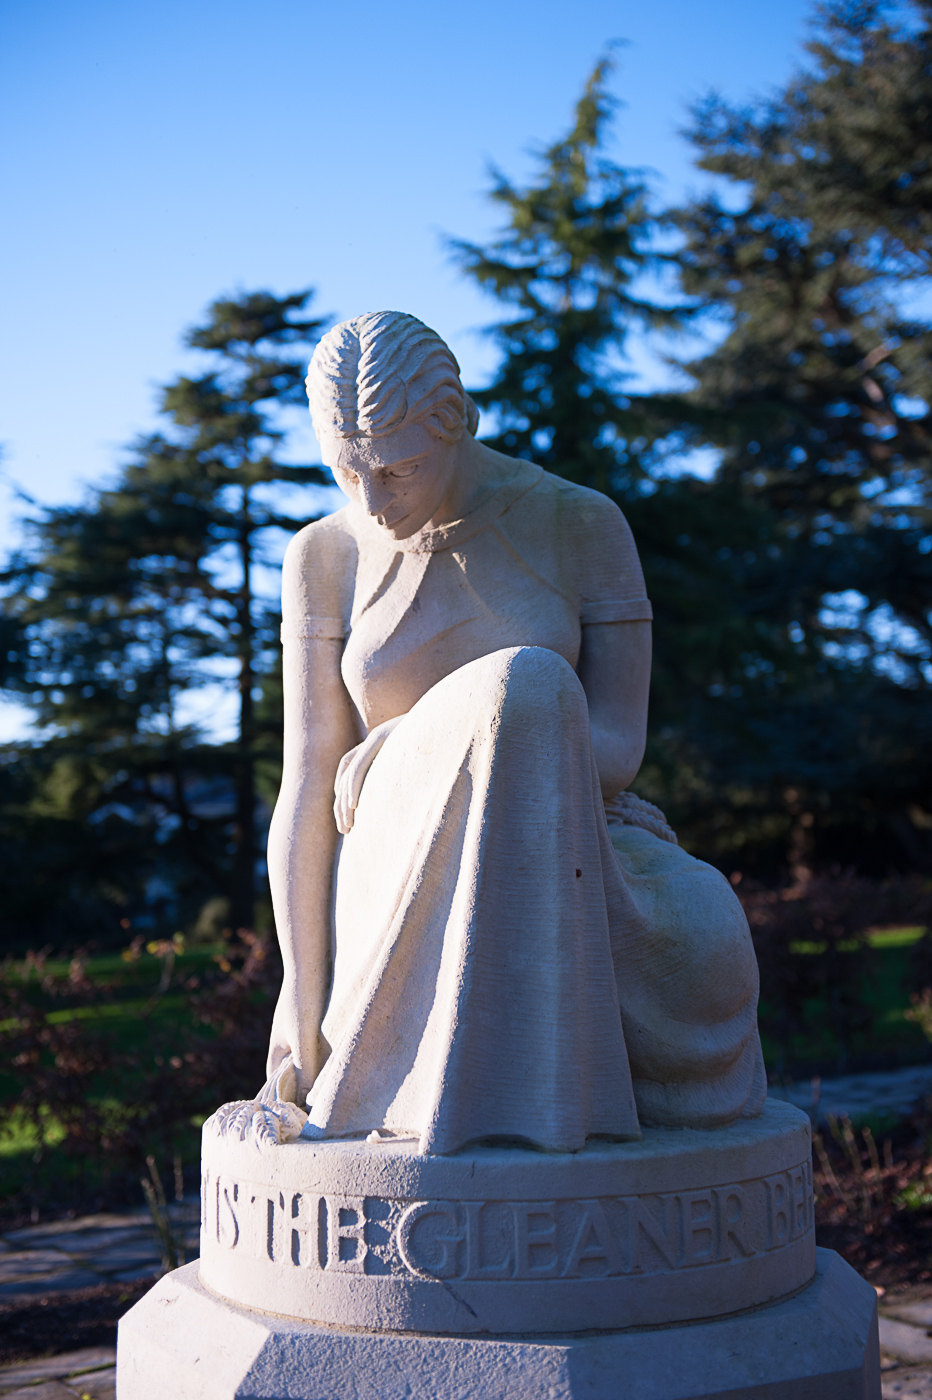
For my subject I chose ‘The Gleaner’ sculpture by John Knox which stands in the grounds of Stormont Estate. I chose her because she is gloriously lit by the setting sun on a clear evening and there is 360 degree access to shoot the the sculpture enabling me to use a single subject for all 4 lighting techniques.

Front Lighting

This is an example of axial lighting where the direction of the light aligns to the lens axis. This is achieved by ensuring the sun is directly behind the camera during golden hour. Axial lighting can be achieved in the studio by using a ring flash.

The characteristics of a photograph shot in this type of light are :-

  • There are no shadows present.
  • Strong light reflected directly back at the camera.
  • Flat 2D appearance

You will notice in the photograph below, there are shadows present on the woman's hair, arm and dress. This is due to the sun not being exactly aligned to the cameras axis. One of the difficulties of this lighting method is the potential for the photographer's shadow to appear in the photo, and the lower the sun, the more this becomes a factor. To avoid this I moved slightly to the right until my shadow was no longer striking the sculpture but this in turn created the shadows seen in the photo(my shadow could also have been eliminated by using a longer lens and moving back from the sculpture, thus allowing me to re-align for true axial lighting)

Low sun ex small-1001

Side Lighting

In the photo below the subject is lit from the left. Roughly half of the subject is lit and half is in shadow. Choosing the correct exposure becomes a balancing act of trying not to lose detail in the shadows whilst not blowing out the highlights on the lit side of the subject. Shooting shortly before the sunset means that the light is less intense and therefore reduces the dynamic range. The direct lighting gives sharp edges between the light and dark areas of the photo leading to an image with more contrast.

Low sun ex small-1002

Back Lighting

In the photo above, the subject is back lit, in other words the subject is between the light source and the camera. One of the problems of shooting into the sun is the high dynamic range between the sun and the shadows in a photo. This can cause sensor clipping at the top end of the dynamic range (sometimes know as blown highlights) and loss of detail in the shadows at the lower end. To avoid this I have obscured the sun with the subject and by doing so have reduced the dynamic ange that the camera has to deal with.

This is a somewhat softer photograph than the previous two shots because the subject is lit from various directions by the reflected light of the sun.

Low sun ex small-1003

Edge Lighting

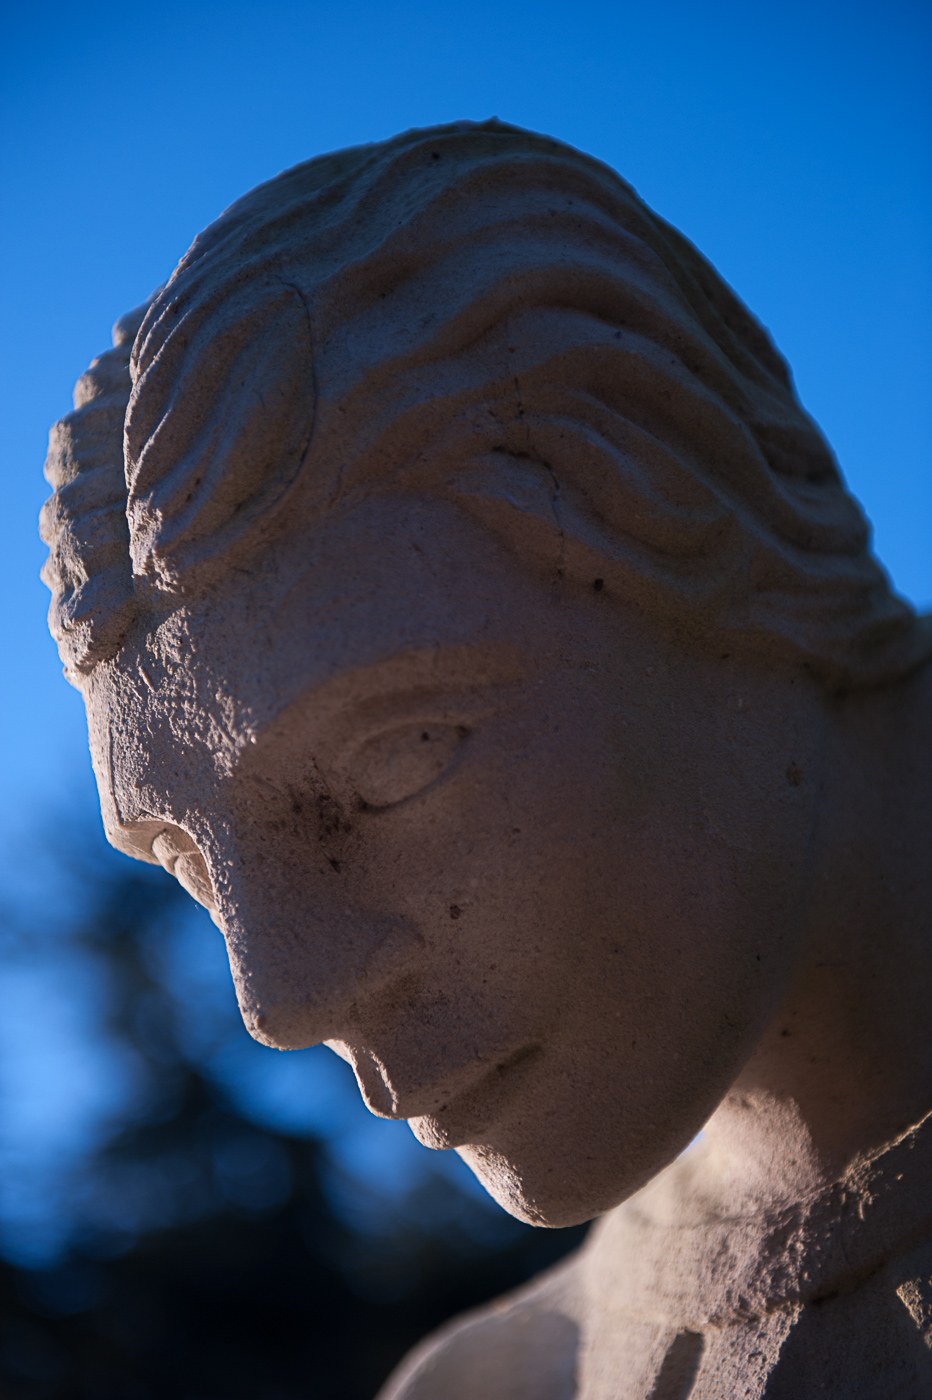
To achieve edge lighting you shoot towards the sun (light source) but keep it outside the frame. A dark background is also desirable as it enhances the highlighted edge.

Low sun ex small-1004It is also worth noting that the intensity of light has an effect on how you expose for an edge lit photo and consequently how that  final photograp looks. If the light had been brighter the exposure would have been shorter and there would have been more of a halo effect and a distinct loss of detail in the shadows similar to the image below.

Processed edge small-1030

Reflection

This exercise has expanded my knowledge of lighting. One of the first pieces of advice I was given when I started to learn photography was get a 50mm prime lens as it will teach you to zoom with your feet. The idea behind this was that by limiting yourself to one focal length it would make you move and explore to get the best shot. Similarly here the light source was fixed, as was the subject so I had no alternative than to move the camera to get the required lighting effects.

We are exploring a three dimensional world and creating two dimensional images of it and the position of the camera has an effect on the visual relationships between the objects in the flat image we produce (Shore, 2007). In the photographs above we can also see that there is a relationship with the objects in the frame and the light source and how we position the camera has a huge bearing on the final image (when we are using a light source which we cannot move).

In the world there are an infinite number of places to position the camera therefore it is worth putting some thought into where you should shoot from and experiment with various viewpoints.

Judging Colour Temperature 2

In the previous exercise we discovered that the colour of light changes throughout the day and is also dependent on your surroundings. This exercise explores the effect of the cameras white balance (WB) setting on colour temperature. Most photographic film was balanced for "daylight" (ie 5500k on the colour temperature scale) therefore similarly to ISO, once you had your film in the camera you were stuck with that setting for the 24 or 36 frames on the film. This was not a huge issue if you were shooting in daylight but when shooting in a room lit by tungsten bulbs photographs would have a yellow cast (Freeman.1990).  This could be overcome by using tungsten balanced film (eg Kodachrome 40) but you would be locked to the tungsten "setting" for the remaining frames on the film.

Freeman (2013) tells us that the colour of an object  is a combination of the colour of the objects  surface and the colour of the light hitting that surface. Therefore if we can control the colour of the light we can more faithfully reproduce the colour of the object/scene that we are photographing.

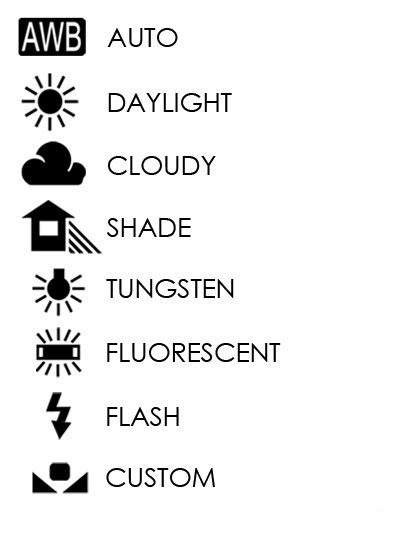
This exercise illustrates that concept. Modern digital cameras have the ability to set the colour temperature on individual photos if desired using the settings seen below. The custom white balance setting will allow the user to apply an individual setting on the colour temperature scale. The auto setting will attempt to automatically select the correct white balance value . As camera technology improves, the algorithms used to calculate auto white balance become more accurate. The auto white balance on my phone is incredibly accurate when taking photographs.

White_Balance2

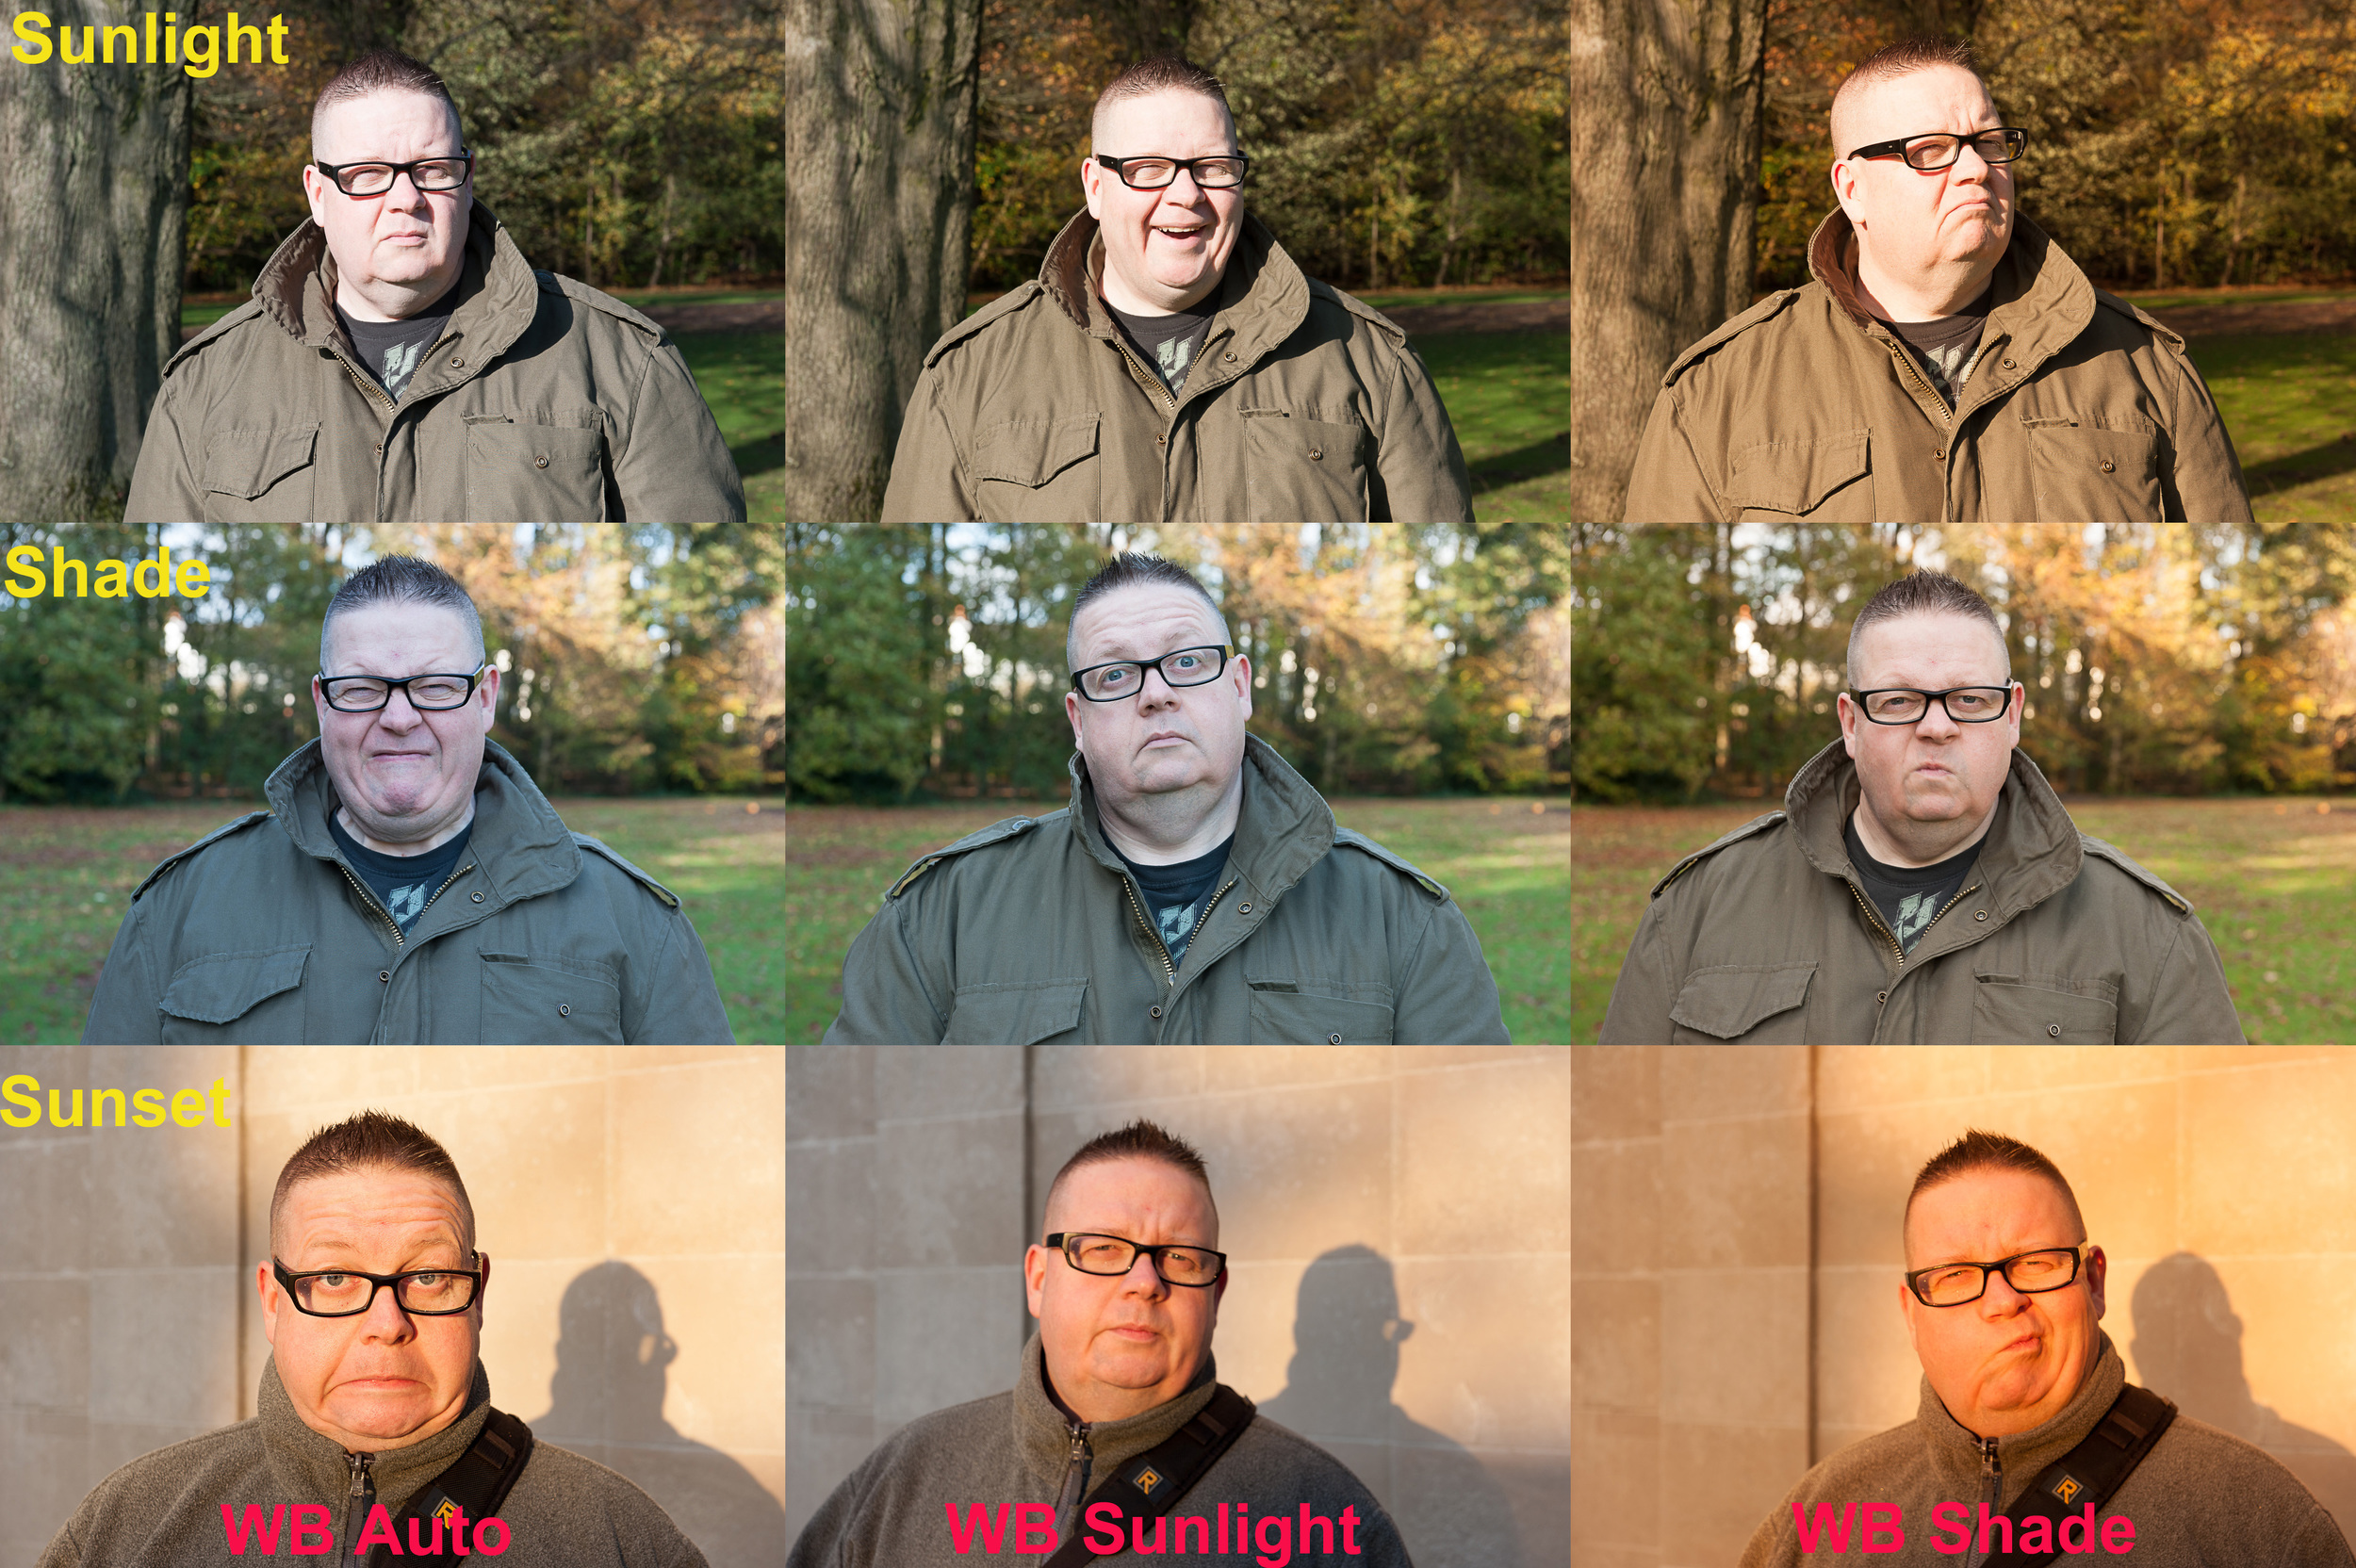
For this exercise I was to repeat the previous exercise of taking photos in midday sun, shade and sunset using the "daylight" white balance setting, but I was to also shoot on the "Shade" and "auto" white balance settings.  the results can be seen in the matrix below

Face Matrix labeled

it is immediately apparent that regardless of the the WB setting, the photos taken at sunset, have a very yellow/orange cast . I would have expected the auto WB setting to be more accurate but perhaps as I have a slightly older camera (D700) its white balance features may not be as advanced as some of the newer models. I also noticed that because of the different backgrounds, in some cases,  it was hard to judge the colour of my skin from photo to photo so I cropped the photos to show an area of my forehead from each shot.

Skin Matrix Labeled

What stands out in these shots is the variation in the auto white balance column. The three photos go from white to grey to orange. The other stand out is that, the photo taken using the sunlight white balance setting in direct sunlight and the photo taken using the shade white balance setting in the shade are virtually identical in hue and tone. which tells me that my cameras calibration is good even if the WB auto detection is not.

There is another element to compensating for white balance. Your digital camera has a processor onboard that takes the raw data hitting the sensor and processes it into a .jpeg file that is a common file format which can be read by computers (or phones and tablets) without the need for specialist proprietary software. In short it makes it easy for you to view and  share your photographs. However there is a down side to allowing your camera to produce the .jpeg file. The settings are baked in and cannot be changed so if you shoot at the wrong white balance setting, or as in the case of the d700 the auto white balance is not incredibly accurate, you are stuck with it.

Many cameras will allow you to save your photos in RAW format ie record the raw data produced by the sensor which can then be processed on a computer (using specialist software) to produce the finished photograph. The workflow is comparable to shooting film and then producing negatives in the darkroom. RAW files are sometimes referred to as “Digital Negatives”.

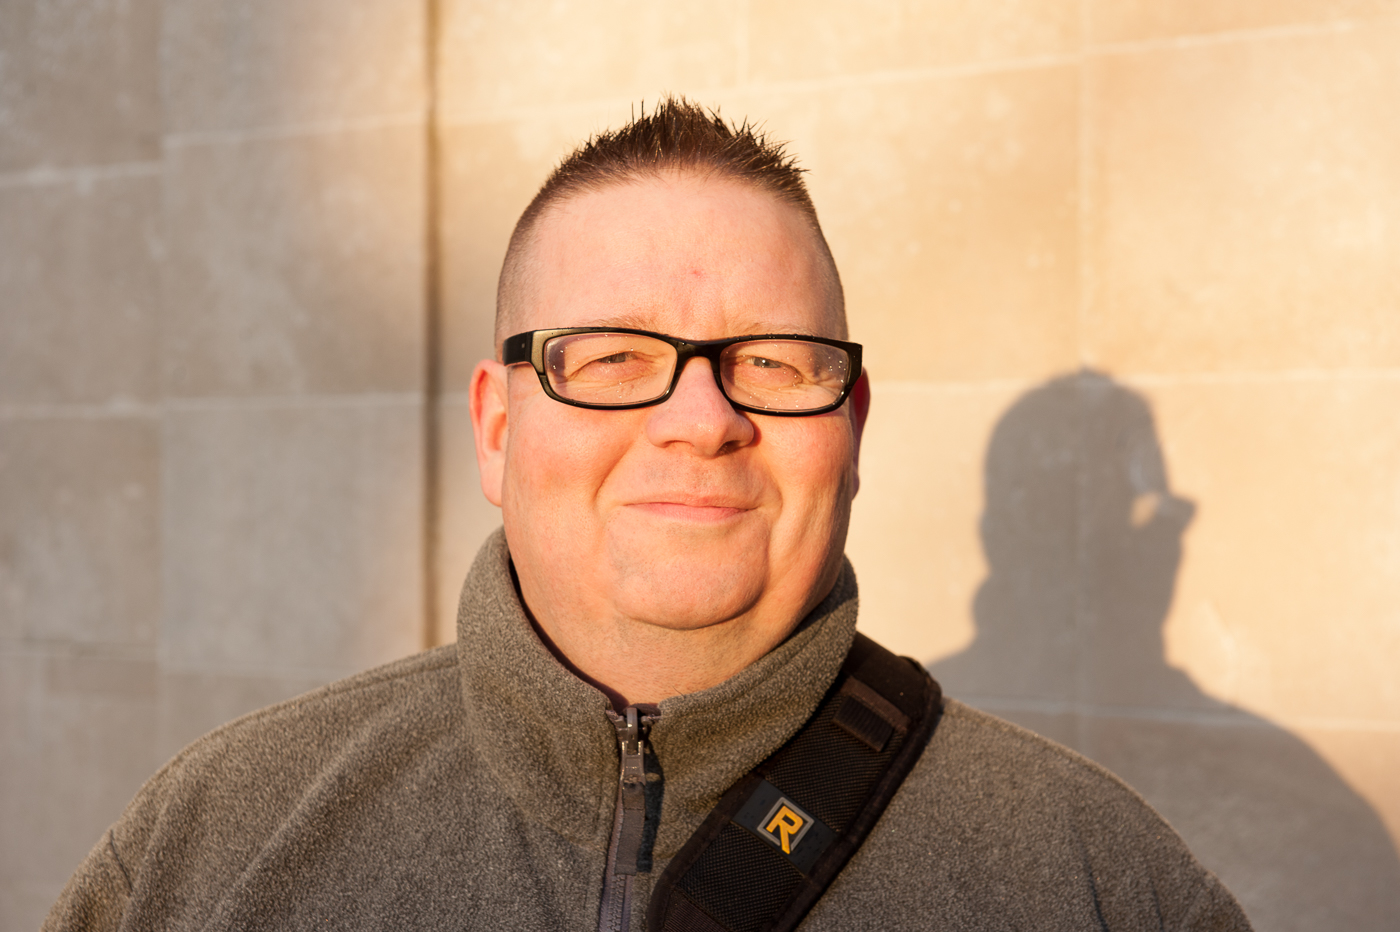
Using a proprietary software such as adobe lightroom, apple aperture, darktable, lightzone, rawstudio, capture NX or one of the numerous other programs, you can make adjustments to your photographs before producing a final .jpeg image. One of the adjustments you can make is white balance. You can see in the 2 versions of the photograph below I have made WB adjustments to give myself a much more natural skin tone.

Rawsmall-1015 Rawsmall-1014

Reflection

I am most at home on this course when I am doing a technical exercise and on the face of it that’s what this was. I got to wax lyrical on settings, software, colour temperature and cameras, But underlying all this techno babble this there is another lesson to be learned from this exercise.

Light has varying colours depending on the time of day and this can be used to embue your photos with feeling and atmosphere. The yellow orange light of sunset can give a photo warmth as Renoir did with Le déjeuner des canotiers. The blue grey light produced by the shade gives a coolness think of Van Gogh’s self-portrait 1889. I am in no way comparing my work to these great artists but merely stating that the colour of light (and consequently the ability to adjust for it using white balance settings or software) is another way to express yourself in your photography and convey a message or feeling to the viewer.

I am learning that many of the things that we strive for when we start to learn about photography (e.g. perfect exposure, perfect composition, pin sharp focused photos, correct white balance. faithful colour reproduction) are part of photography craft. They are actually subjective and can be manipulated to communicate with the person viewing the photograph and produce photographic art.

Judging Colour Temperature 1

This exercise was to illustrate the effect of the colour of light on a photograph. I was to take 3 photographs of the same subject with the cameras white balance set to daylight:

  • Photo 1: in full sunlight during the middle of the day.colour of light small-1001
  • Photo 2: in shade during the middle of the day.colour of light small-1002
  • Photo 3 : when the sun is close to the horizon.colour of light small-1003

there are obvious colour differences in the three photos. In the first photo my skin is at its most natural given that the colour of light in the middle of the day (on a clear day) is white. in the shade my skin appears more blue-grey and at the sunset i am almost umpa lumpa orange.

When I was taking these shots I don't remember my skin colour changing to this extent. This because our eyes adapt to the colour of light and things appear to be lit neutrally. it would be more correct to say that our brain adapts to the messages being sent to it by the eye and so we perceive colours in shade (or in some cases in artificial light) somewhat closer to how they would look if they were lit by a white light.

the skin colour in photo 1 is a little more yellow than I expected to see and this could be down to several factors.

  1. The photos were taken in winter sun which is lower than summer sun
  2. The camera's "Daylight" white balance is not perfect
  3. The monitor on which I am viewing the photos is displaying the photos with a slightly yellow hue (I do regularly calibrate my monitor)
  4. I am actually yellower than I think I am
  5. a combination of the first four factors.

By using a single white balance setting this meant that any changes in colour between the photos was based on the quality of the light.

(Freeman:2013) tells us that, on a cloudless day,  light is made up of around 85% direct sunlight. The remaining 15% is made up of diffuse sky radiation which comes from the sky reflecting the blue wavelengths of sunlight. Therefore by standing in shade (ie cutting out the direct sunlight) I am lit by the blue light and some light reflected bu my surroundings.

Reflection

I am back in my comfort zone with these technical exercises. they do force me to ask questions and research the answers. I had no idea why there was a blue hue to photos taken in shade for instance. I have covered the colour of light before on different courses and thought I knew all about it but this exercise has proved me wrong. Many of the tasks on this course are deceptively simple yet guide you to a way of thinking more deeply about the subject.