OCA TaoP

OCA degree in photography module 1

Focus with a set aperture

For this exercise we were asked to take three photographs of a scene with depth, with a focal point at different depths in the scene. Unfortunately due to time pressures the photographs are not the most beautiful or interesting, but they do illustrate the concept of “Shallow depth of field” quite well. Focal Point deep in the photo.

Focal point at the mid point of the photo

Focal Point close to the camera

So which of the photographs do I prefer? It would have to be the first photograph were the focal point is deep in the photograph and the lamppost and building are sharp and in focus. It’s the most visually appealing photograph because compared to the other two there is more interesting subject matter in focus. The closer the focal point gets to the camera, the more the building and lamppost are thrown out of focus, and this makes for a less engaging photograph. That is not to say that the first photograph is an attention grabbing or show stopping image. Below you will see an portrait of my daughter were I have used a shallow depth of field and leading lines to draw attention to her as the subject of the photograph.

ellie-1001

I find a photograph of my daughter or interesting than the three above because; –

  1. it has my daughter in it
  2. it’s more colourful
  3. it hasn’t been taken to illustrate a technical point in photography
  4. I find people more interesting than lampposts.

Focal Length and Angle of View

This exercise had two parts, firstly we had to find the standard focal length of the lens, and secondly to use a zoom lens to show different angles of view. Standard focal length

So I got my trusty D 700 with the 24 to 70 F2 .8 and began holding it up to my right eye and intermittently closing my right and opening my left whilst zooming, to find the focal length which best matched what I saw with my naked eye. Common understanding amongst photographers is that the standard lens (i.e. that which is closest to your own vision) on a full frame camera is the 50 mm. I was very surprised to find that it was closer to 70 mm before both views were equal. So it became obvious to me that I would be zooming between wide and “standard” for the exercise as the lens is a 24mm to 70mm. So at this point in proceedings I grab my daughters Sony a200 with its 18 to 200 zoom lens. This would help me properly tackle the second part of the exercise, but the crop sensor on the a 200 may just add more confusion.

Angle of view

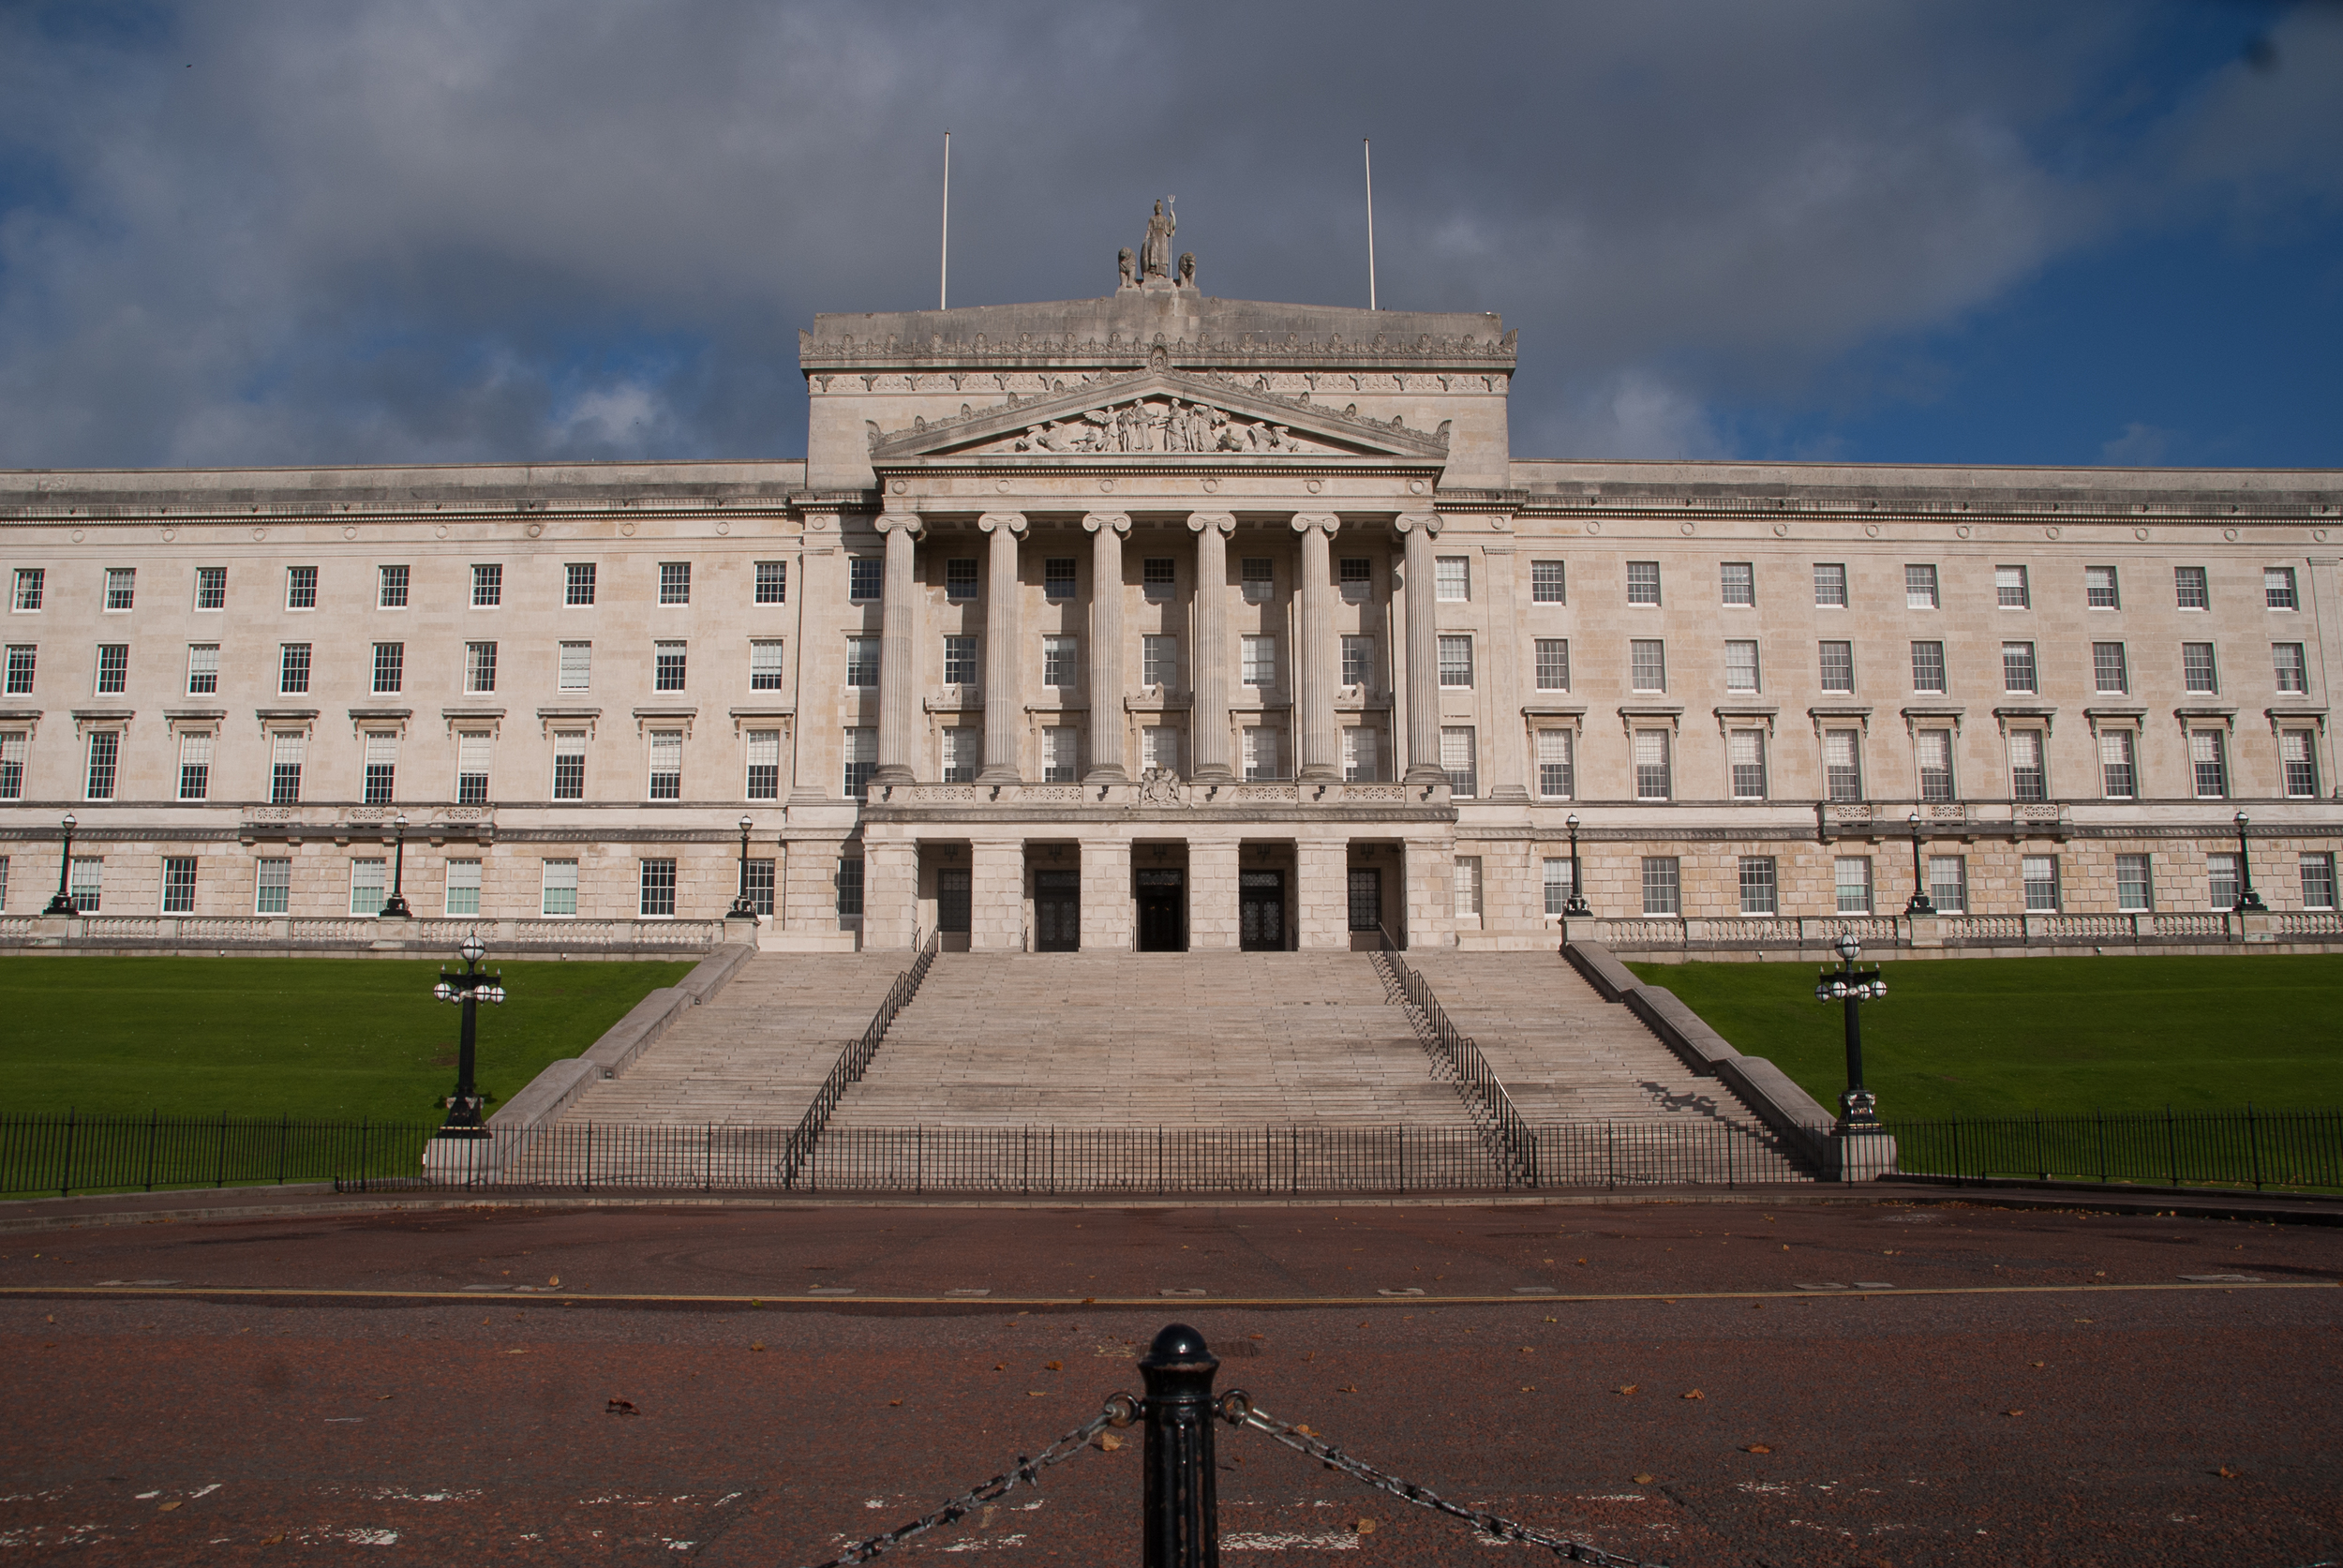
The scene I selected for the angle of view exercise was Stormont government buildings near Belfast. I set up the tripod firstly with the D 700 and took the following images at 24 mm, 50 mm, and 70mm.

Nikon D700 70mm

Nikon D700 50mm

Nikon D700 24mm

From where I was standing the 70 mm was definitely closest to what I saw with the naked eye. Then it was the turn of the Sony a 200 to take its place on the tripod. I shot images at 18 mm, 50 mm, and 200 mm.


Sony A200 200mm

Sony A200 50mm

Sony A200 18mm

If we compare the images side-by-side we start to see high focal length on the crop sensor differs from that on be a full frame sensor. The photographs on the right were taken with the Sony a 200, the crop frame camera.

Introduction_focal_d700-1000 SONY DSC

As you can see the photograph from the Nikon full frame camera taken at a focal length of 24 mm is wider in angle of view than the photograph from the Sony crop sensor camera taken at focal length of 18 mm (supposedly wider). So what becomes evident is that the full frame sensor gives you a much wider angle at the equivalent focal length. This becomes more obvious in the next two photographs as they are both taken at a focal length of 50 mm

Introduction_focal_d700-1001 SONY DSC

We can clearly see in the images above that the Nikon full frame gives a much wider angle than the Sony crop sensor at the same 50 mm focal length. In fact if you look at the photographs taken with the Nikon at 70 mm it has a similar angle of view as the photograph taken with the Sony at 50 mm

Introduction_focal_d700-1002 SONY DSC

I will return to this post and update it with the second part of this exercise were I will compare her prints of photographs at the place where those photographs were taken.

Getting to know your camera

Introduction-1002 Introduction-1003The The aim of the project was to get to know my camera better. I have a Nikon D700 Digital SLR camera. I have had the camera for around two years and have used it to shoot portraits and weddings as well as family photographs, so I am very familiar with the operation of the camera. I downloaded the manual from the Nikon website and set about the task of grinding through the 400 pages of highly technical information. It has to be said that this book is not a page turner filled with intricate plot twists and detailed characterisation. I managed to get through the sections on getting to know the camera, focus, release modes, ISO, exposure, white balance, and flash photography quite quickly as I am relatively familiar with how these work on the D700. Then the manual takes a turn for the worse as it gets into the "menu guide" section and starts to break down each menu item into much greater detail. This did give me a feel for what highly complex piece of equipment the camera is and the level of customisation available to professional photographers who want to have a suite of settings to use in particular situations. Many modern cameras have the ability to upgrade their firmware and my camera is no exception. Firmware upgrades provide bug fixes, new functionality, or give the camera the ability to operate with new accessories and equipment. This exercise prompted me to check and I was indeed several firmware versions behind. I simply follow the instructions in the manual, download the latest firmware, and upgraded the camera.

F-stop

This number is a ratio of focal length to Aperture. This means that you can be sure when you use the same f-stop regardless of the lens you are using, the same amount of light is hitting the sensor (or film) in the camera.

Introduction-1000

So using the f-stop ratio the higher the f-stop number the smaller the aperture and vice versa. Controlling the aperture is one of the ways we can control the amount of light hitting the sensor. By increasing the size of the aperture we increase the amount of light entering the camera. The amount of light is not the only thing affected by the aperture. Depth of field will also change when the aperture is changed.

We also have another method for controlling the amount of light hitting the sensor, and that is the shutter speed. The shutter is a mechanism that controls the amount of time that the sensor is exposed to light. We can have that widest aperture imaginable but no light will hit the sensor unless we activate the shutter. The longer the shutter speed, the more time the sensor is exposed to the light entering the camera. By combining these two elements we get exposure. There is a third element of exposure which has become more prominent with the advent of digital photography, and that is ISO. With film cameras you selected your film based on the conditions you thought you would be shooting in. So if you’re shooting outside on a bright sunny day, you would select a film with a low ISO. You would therefore be stuck with that ISO for the number of exposures on that film. On digital cameras ISO is a measure of the sensitivity of the sensor and can be adjusted for each shot if necessary. The higher the ISO number the more sensitive the sensor.

Time Management and Motivation

It would appear that I have underestimated the amount of work needed to complete a degree. I have had the course materials for three weeks my and this is my second blog post. The difficulty of working full-time and studying in a self disciplined manner, rather than going to scheduled classes, is proving challenging. I find myself procrastinating rather than getting down to doing some serious work. I am also all a little frightened to start the exercises in case I get it wrong. I am starting to suffer from analysis paralysis. Actually it's more like second-guessing and doubting myself before I even start. In previous experiences of studying photography, at a level and GCSE, I would wait until the very last minute and then cram a years worth of work into the last month to study. Looking at what needs to be done at least they have realised that I cannot do that at degree level.

I have set myself the goal of completing the introductory exercises by the end of October (today is 22 October 2013).